Friday, December 20, 2013

Red Cabbage Salad - Japanese Style

Tired of the same old salads?  Try this fresh and healthy Japanese style salad.  The red cabbage and dressing have to stay, but it is the kind of dish that's very adaptable to the inclusion of all sorts of other ingredients - like chopped green chilli, finely sliced cucumber, mint, coriander, crumbled seaweed sheets, pieces of barbecued corn sliced off the cob...................................................

Salad
2 cups finely shredded red cabbage. This is where a mandolin slicer comes into its own.  (You could use 1 cup of red and one of green Asian cabbage).
1 cup grated carrot.
1 cup bean sprouts.
1 tbs spring onions OR chives, finely sliced.
1 tbs sesame seeds, toasted.
1tbs pepitas, toasted.
(this time I also added a desert spoon of pickled ginger - optional)

Sauce
1/3 cup light olive oil
1 tsp sesame oil
1 tbs tamari (or light soy sauce)
1/4 cup sugar
1/4 rice wine vinegar
salt and pepper to taste, freshly ground

1.  Lightly toast the sesame seeds and pepitas in a heavy based frying pan until they begin to pop - be careful not to let them burn.  Leave to cool.
2.  Mix all the salad ingredients together with the cooled, toasted seeds.
3.  Combine all the sauce ingredients and stir until the sugar has dissolved.
4.  Pour the sauce over the top of the salad when you are ready to serve.

We had this with some barbecued fish, steamed brown rice and my pineapple oil pickle.  Very, very yummy and healthy.

Wednesday, December 11, 2013

Ricotta Cheesecake-Italian Style

This is a fabulously easy recipe that  doesn't require a pastry or biscuit crust - it sort of makes one itself!  I use ricotta that I have either home made, or you can but in bulk at a very reasonable price - so it's a very economical dessert that is great with all kinds of summer fruit, and a real winner for holiday picnics and Christmas lunches.

It's a traditional recipe in the Italian repertoire, but you will find variations on this theme all over the Mediterranean from Sicily to San Sebastian to Santorini and Sardinia.  I had a variation on this for my birthday on the Greek Island of Skopelos in the wonderful Adrina Hotel - made with the local curd cheese - myzithra and decorated with callendula petals (now where was I?)

Ingredients
750 g ricotta
2 tbs Greek style yoghurt
1/2 cup caster sugar
1/3 cup plain flour
good pinch salt
2 tsp finely grated orange zest
1 tsp finely grated lemon zest
1 tsp vanilla extract
5 eggs

Optional extras 1/3 cup sultanas that have been soaked in orange liqueur.
Flaked almonds, toasted to decorate

Method
1.  Preheat oven to 150oC
2.  Grease 23 cm springform pan and cover the bottom with non-stick baking paper (how on earth did we manage before this stuff was invented?).
3.  Lightly grease the base and sides of the pan with butter and roughly coat with a spoonful of flour - this helps to make the crust.  This is not an exact science and rough is fine!
4.  Cream ricotta in food processor until smooth.
5.  Add yoghurt, sugar, vanilla, flour, salt, citrus zest and eggs and 'whaz' (I think I've been watching too much Jamie Oliver?) until smooth - about 30 seconds.
6.  At this point you can fold in the alcohol soaked sultanas - this makes more of an 'adult' dessert. and decorate the top with toasted almond flakes - both optional.
7.  Pour into your prepared cake tin and bake in the oven for about an hour.  The top should be lightly golden and cake firm to touch.

This cake will normally rise quite a bit and then sink and crack - get ready for the rustic look!  Great with poached or fresh summer fruit and a little extra cream.  This has to be one of the easiest and yummiest cakes to make - enjoy.
Adrina (dreamer!) Hotel, Skopelos, Greece. Most fabulous place and great food in their restaurant.

Thursday, December 5, 2013

Pineapple Oil Pickle

I am very fortunate to have Belinda Jeffery as a friend and neighbour - she is my 'go-to' cooking guru.  This recipe is from her wonderful cookbook 'The Country Cookbook'.  When I was commenting to her that the ingredients were redolent of southern Indian or Sri Lankan cuisine she said that she had, in fact, first tasted this in Sabah (north Borneo) and made by a Malay/Chinese cook in the house where she was staying - oh, the wonderful world of food and cooks!

This fantastic pineapple oil pickle is one that I have had dog-eared for a while in Belinda's book, just waiting for the pineapples to come into season again.  It is an extremely pungent and fragrant pickle and, if I could have bottled the aroma of it spreading through the house while I was making it, I think I would be a wealthy woman!

A jar of this would make a fantastic Christmas gift!
Ingredients
21/2 cups white vinegar
2 tsp fenugreek seeds
2 very large, very sweet pineapples
6 large or 10 medium cloves of garlic, peeled
1/2 cup finely chopped fresh ginger
1/2 cup cumin seed, freshly ground
1/2 cup coriander seed, freshly ground
21/2 cups light olive oil
2 tbs mixed black and yellow mustard seed
36 fresh curry leaves
11/2 tbs fennel seeds
1 tbs ground turmeric
1 tbs chilli flakes
350 g caster sugar
3-4 small red chillies (or more if you like it hot)
11/2 tbs sea salt flakes (or more to taste)
Bella and Kashmir's fantastic roadside stall with great homegrown and local produce - cheap and fresh.  It's pineapple pickle time!

Method
1.  Pour the vinegar into a food processor and stir in the fenugreek seeds.  Set aside while you prepare the pineapple.
2.  Sit a large colander over a bowl.  Peel and core pineapples and chop finely, scooping the chunks into the colander as you go.
3.  Place a plate over the top of chopped pineapple and weigh it down with something heavy (cans of tomatoes!).  Press down on the cans every so often and leave for 30 minutes or so.  Enjoy the strained juice while you're making the rest of the pickle - you don't need it for the pickle.
4. Add the garlic, ginger, cumin, and coriander to the vinegar mixture, and blend together until everything is well pureed.  Set it aside.
5.  In a large stainless steel pan heat the oil.  Add the mustard seeds, curry leaves, fennel seeds, turmeric and chilli flakes and stand back - there will be a lot of spitting and heady pungency rising up from the pan. 
6.  Carefully pour the pureed vinegar mixture into the pan - down the side of the pan is a good idea (you know the thing about adding fluids to hot oil - be careful!) - mix together and cook the mixture for a couple of minutes.
7.  Now add the the drained pineapple, sugar, chopped chilli and salt.  Increase the heat and bring the mixture to the boil, reduce the heat and let it bubble gently for about 30 minutes until the oil floats to the top. Scoop a little into a cup, let it cool and check for salt and chilli heat. 
8.  Remove from the heat and pour into hot, sterilized jars.  Make sure the oil covers the top of the pineapple in each jar.  Cover with a clean tea towel until cool.  Once they are completely cool, seal the jars tightly - will keep for 6 months or so in the fridge.  Improves with time and Belinda refers to the golden oil in this pickle as 'liquid gold'.


NOTE:  I had friends over for the dinner on Saturday and we had this pickle with duck salad and rice.  It was a huge hit and a whole jar disappeared on the left-over rice - just yummy!

Saturday, November 23, 2013

Pasta Bake


Pasta Bake - this is a meal that will make the whole family happy.  I actually can't think of anyone that doesn't like pasta and this is a dish that you can expand if you suddenly find yourself not two for dinner, but six - this happens to me quite often!  I usually have some bolognese sauce in the freezer and you only need a portion for two to make a dish that will feed six to eight.  You will probably realize that these are the same ingredients for a traditional lasagne - this is just a bit quicker and easier to prepare.

I am currently in Sydney for the birth of grandchild number seven - a beautiful brother for two year old Taj and, of course, grandma is on cooking duties.  It's not always easy to find dishes that please the whole family but this is certainly one that is often requested - from tiny children to big people.
Two year olds love their new brothers' ears and pasta bake!

You will need three things:  A portion of bolognese sauce, some kind of tube pasta (I use penne) and some bechamel sauce.  There must be as many recipes for bolognese sauce as there are Italians, but this is mine.

BOLOGNESE SAUCE
500 g good quality minced beef (I actually prefer a mixture of pork and veal, but it's not always available,
 so beef will do).
1 large brown onion, peeled and chopped finely
1 stick celery, chopped finely
2 cloves garlic, crushed
1 400 g can chopped Italian tomatoes
1 720 ml jar passata (pureed tomato)
2 bay leaves and one sprig fresh thyme
1 glass red wine (don't worry about giving alcohol to children as it cooks off - its just for flavour and colour)
3/4 cup of extra virgin olive oil
Seal salt and freshly ground black pepper

  • Heat half the oil in a heavy bottomed, wide saucepan or casserole dish. 
  • NOTE: This may seem like a lot of oil, but this is one of the keys to success of making a good bolognese.  It makes the sauce luxuriously thick that nicely coats any pasta.
  • Cook the onion until just turning colour, remove from the pan.
  • Now brown the mince until the juices have come out and then evaporated.
  • Add the remainder of the oil and then celery, tomatoes, passata, garlic, herbs, wine and salt and pepper.
  • Simmer slowly for at least 11/2 hours - the oil should rise to the surface. Give it a stir, every now and again, to prevent it sticking.
  • NOTE: If you need to go out, you can cook it in the oven like a casserole - it actually takes on a richer flavour.
  • NOTE:  This makes 3-4 portions for meals serving 2 people.  You will need one portion for the next step in this recipe and you can put the rest in the freezer for another day.

Bolognese sauce - enough for 3 meals, that has been cooking for about an hour and a half; penne on the boil and the bechamel sauce.
PASTA
  • Heat your oven to 180oC
  • Bring enough salted water to the boil to adequately cover the amount of pasta you need to cook - this will depend on how many people are coming to dinner. 
  • Cook the pasta until al dente - chewy, but not sloppy.  Use a large saucepan or casserole dish that you can transfer to the oven - I'm saving you washing up here!

BECHAMEL SAUCE
50 g butter, melted in a saucepan - be careful not to let it burn
1 tbs plain flour
500 ml fresh milk
salt and white peppper
1/4 tsp grated nutmeg
1/2 cup parmesan cheese

  • Add the flour to the melted butter and stir on a low heat until it makes one clump - this is called a roux.
  • Take off the heat and whisk the milk into the roux.
  • Return to the heat and cook until it thickens - should coat the back of your wooden spoon.
  • Add the nutmeg and salt and pepper to taste.

Penne with the bolognese sauce added and bechamel about to go!

ASSEMBLING THE PASTA BAKE

  • Stir the bolognese sauce through the cooked pasta.
  • NOTE: If you want it to even further add any of the following: another can of tomatoes, sliced mushrooms or pre-cooked grilled peppers.
  • Pour the bechamel sauce over the top
  • Sprinkle with parmesan cheese
  • Cook in the conventional oven for 15-20 mins on 180oC then turn to grill part of oven to 'golden' the top for 5 minutes. 

Tasty, simple and nutritious meals for all the family - pasta bake

Wednesday, November 20, 2013

Propagating Cuttings

Making New Plants from Old - It's Fun, Free and Easy.
(Or, how to share your garden with everyone!)

When I was a child, just about every garden was made from other plants -  everything was propagated. The Aladdin's Cave of  21st century garden centres were not around and besides, folk just didn't have the money to buy lots of plants.  When family and friends came to visit they generally brought with them something special from their gardens - a prized plant; cuttings, bulbs and seeds - usually wrapped up in a piece of newspaper for my dad to nurture and perpetuate in our garden.  (The first thing these people would do on their next visit would be an inspection of their 'baby' to make sure my dad hadn't managed to kill it!  We had a lot of 'accidental deaths' with dahlias as my dad couldn't stand them!) )

The beautiful Gardenia magnifica - flowering in all its glory in my garden right now and struck from a bunch of flowers I received about ten years ago.  I have propagated about 5 of these bushes for my garden, and have made many more for friends and family - all from one bunch of flowers!

I seem to have morphed into my parents!  They have had a plant stall outside their place for years selling produce from their garden, and now I have one outside mine, mainly selling plants that have all been propagated from things in my garden.  I have come to realize that, actually, some of my favourite times in the garden are the hours I spend propagating - I find it very creative and deeply satisfying.

FACT:  First of all, a word about SEEDS v CUTTINGS.  SEEDS are the children of the plant and, like children, they will all be similar to the parents, but different - some more different than others.  With CUTTINGS you are getting an exact copy of the parent plant - like a clone. This is useful if you want the plant to look exactly the same as the parent plant OR if seeds are hard to come by - as with plants like camellias, gardenias and many other ornamental shrubs.
Semi-hardwood camellia cutting

STEP 1: Select the plant that you want to take cuttings from. Do this on the day that you are going to strike them as cuttings will always take better if they're really nice and fresh and from the healthiest, best material off the parent plant. I usually do this in the morning before the day gets too hot.
Camellia cutting prepared for planting - note the cut-off at the bottom just below the node. 

There are three types of cuttings:
  • Soft wood cuttings, from stems that still bend and move (like my rosemary cuttings and the grevilleas pictured below)
  • Semi-hardwood cuttings, from stems that are slightly firmer and stiffer (like gardenias and camellias)
  • Hardwood cuttings, from stems off deciduous plants when they're completely dormant, generally taken in mid-winter (like roses and deciduous trees)
    Small-leaved grevillea cuttings.  This is a soft-wood cutting.
STEP 2: You will need the following:
  • Propagating medium. You want a fine free-draining mix that will fit snuggly around the cuttings.  I use sieved soil, compost and some perlite/vermiculite.
  • A really good, sharp pair of secateurs.
  • Propagating hormone. Either hormone powder or the liquid or gel version, which is particularly good if the cutting is from a plant that bleeds sap as it seals the whole cut. You can even use honey. All these products help stimulate callous tissue that will then encourage the cutting to produce roots.
  • A dibbler. This can be a pencil or a chopstick.
    Grevillea cuttings prepared for planting with two-thirds of the lower leaves removed
STEP 3:
  • Make your cuttings about 15cm long, look for a node where the bud or a leaf scar was and make a clean cut just below it. A node is the spot that has the greatest concentration of growing cells - i.e. able to produce roots.
  • Remove about two-thirds of the lower leaves by simply running your fingers down the stem.
  • Pinch out any sappy, green growth at the top of the cutting and remove any flowers, fruit or seeds.
  • You will end up with a cutting about 10cm long.
    Grevillea cuttings potted up
NOTE:  When you are propagating from cuttings you want the plant, initially, to put all its energy into making roots - not leaves, flowers or fruit.  That's the reason why most of the leaves are removed.

TOP TIP: If the leaves on a plant are really large - cut the leaves in half as it allows you to put more than one cutting in a pot. It also reduces transpiration of the cutting allowing it to put all its energy into producing roots.
Rosemary cuttings that have already taken root and are now ready to be potted up or planted directly into the garden.

STEP 4:
  • The next step is to get the dibber and make a hole for the cutting in the propagating mix. You should never just push a cutting into the propagating mix as you may damage the cambium tissue, as well as push away any of the hormone product you have on the cutting.
  • Once all the cuttings are in place, water them in well. In the coming weeks, make sure the pot is kept moist. This can sometimes be aided with either placing a plastic bag or drink bottle over the top of the cutting, creating a mini greenhouse.
  • To work out if the cuttings have struck or grown roots, look at the bottom of the pot for root growth coming out of the drainage holes. If so, it's then time to plant them up into individual pots or even straight into the garden.

Rooted rosemary cuttings

Monday, November 11, 2013

Mullumbimby Living Earth Festival 2013

'These Boots are Made for Planting'


If you had ventured into our little town of Mullumbimby on the 1st of September this year you probably would have felt that not only spring was in the air but a real sense of hope (believe me, after the election result a week later we need it - for the first time since 1931 we have no Science Minister and one woman on the front bench - and that's just for starters)!  

Our community came together to put on an amazing celebration of all that is important to us as human beings: family, food security, mutual co-operation, sharing, music, wisdom of the elders, dance, fun and beauty - enough to put a smile on your face from ear to ear - the Mullumbimby Living Earth Festival for 2013 held in our Community Garden.

The program for the day was awesome - in the true sense of the word in that it inspired 'awe'.  How on earth was this going to be pulled off?  To say that what was planned was ambitious would be putting it mildly -  I saw a lot of very tired and harassed Committee members in the week prior to the event.  Needless to say the day was a huge success and, I could tell from all the comments that I received, that everybody went away feeling so glad that we live in this place where these things matter - where we can share, celebrate, be grateful and keep on learning.

It's was absolutely wonderful to see families and friends, young and old, walking around with shining, smiley faces. As Jerry Coleby Williams said to me (ABC Gardening TV presenter) "This place is more than just a garden; it's a sustainable food source, a seed bank, a source of wisdom and ideas - and the heart and soul of this community".

Program for the Festival


The day started with a very colourful and noisy street parade through Mullumbimby and my prize for the best 'float' (wheelbarrow) went to Rasa Dover from the Byron Hinterland Seed Savers for her spectacular effort as a seed fairy.  Rasa's work with Seed Savers epitomizes the tireless hours that countless volunteers put in for the mutual benefit of the whole community.  (If you are interested in seed saving/sharing you should get yourself a copy of the Seed Savers Manual by locals Jude and Michele Fanton - it's a treasure trove of wisdom, inspiration and knowledge)

My contribution was to be a workshop for children and the young at heart.  For two months I had collection points around the place for folk to drop off their old boots.  The idea was to fill them with potting mix and then plant them up with herbs.  I liked the whole concept of recycling old boots and using them as planters for something you could then eat - and the fact that they take up very little space - even folk with just a balcony or small courtyard can do this.  (Got old olive oil cans that you don't know what to do with - click here)


Everyone can grow herbs - people have been growing them for thousands of years and they are an important part of many cultures for their aromatic flavours and aromas as well as their nutritional and medicinal qualities. (Parsley is one of the most nutritious plants we have - click here to find out more)

A handful of fresh herbs on top of a meal often has more nutritional value in vitamins and minerals than the rest of the meal put together.


I have to give a special thank you to the following people for giving me support and helping to make the day such a success: Mullum Rural Co-op - for collecting boots and supplying potting mix; Byron Herb Nursery for all the plants; Sue Nelson at Mitre 10 for collecting boots for me and all the other folk who dropped off boots and last, but by no means least, - my family.  In all, we planted out and folk took home about 70 boots.  Well done!


“The world is so empty if one thinks only of mountains, rivers and cities; but to know someone who thinks and feels with us, and who, though distant, is close to us in spirit, this makes the earth for us an inhabited garden.” 
 Johann Wolfgang von Goethe

Friday, November 1, 2013

Peach Cake

Peach Cake

While many of my readers are hunkering down for the winter we, in Australia, are in the early days of summer - although you wouldn't know it because it is very dry and hot already - it has barely rained for four months and spring was a dream I had one night.

It does mean, though, a great season for stone fruit and I picked up a whole boxful of peach and nectarine 'seconds' for $4 yesterday.  As I had some unexpected little people for afternoon tea I thought I would make this quick and easy cake.

You don't have to use peaches - you can use apples, pears, rhubarb, plums, berries, apricots in fact, any kind of fresh fruit.

200 gm butter
1 1/2 cups soft brown sugar
4 eggs
2 cups wholemeal flour
1 tsp baking powder
2 cups sliced fruit (peaches)
1/2 cup chopped nuts (almonds/pistachios/pecans/hazelnuts)
1 tbs honey

1.  Preheat oven to 160oC
2.  Grease a 22cm spring-form pan and line the bottom with baking paper
3.  Cream together butter and sugar until light and fluffy
4.  Add the eggs one at time, adding a couple of spoonfuls of flour before the last egg (this stops it from curdling).
5.  Fold in the flour and baking powder.
6.  Pour into cake tin and cover with sliced fruit
7.  Top with chopped nuts and drizzle with honey

Bake for 1 hour, or until cooked (skewer comes out clean).  Serve however you like.  We had it with homemade yoghurt.
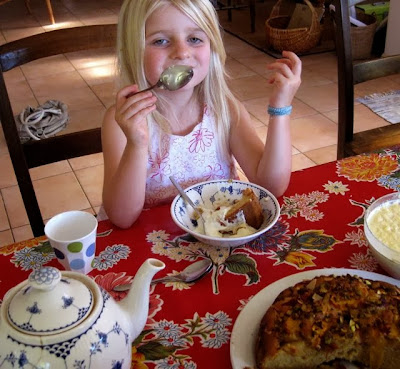
That is a very big piece, for such a little girl!

Thursday, October 31, 2013

Adenium obesum : Desert Rose

Desert Rose (Adenium obesum, Apocynacea)


This is the start of what is going to be a wonderful journey for me, and I hope for you too.  The truly amazing, and incredibly diverse plant world often leaves me awestruck at the sheer beauty and the fantastic adaptiveness of plants that helps them to survive in every climate and  place on this planet - from harsh mountainous regions, to coastal sand dunes, tropical rainforests and all points of the compass in between.

My husband was given this plant as a present (and I have been looking after it for a few years now!).  While not paying it much attention for most of the year, you certainly can't ignore it in early summer when it puts on this fantastic floral display with clusters of pink/red tubular flowers with a white throat.  When it is not flowering, it is still such a quirky, interesting plant and worth having if you live in a warm, frost-free area.


WHAT:  Adenium obesum - its botanic name actually tells us a lot about it, while its common name 'Desert Rose' is quite misleading because while it does originate from desert areas, they are not the dry and arid kind - and is certainly not related to the rose.  When my son was asking me what it was called the other day, even he said "So you would think that it doesn't need much water, but I first saw them growing really well in Bali - the tropics"?  Adeniums are hardy succulents which are more related to Alamandas, Oleanders and Frangipanis than the rose.  They have that typical, white sap common to all the plants in this family of Apocynacea.

WHERE: Named after the former British Colony of Aden (now South Yemen) -  south of the Sahara in tropical and sub-tropical Africa and Arabia are it's natural territory - hence Adeniums also finding a very happy home in sub-tropical Australia, where I live, and places like Bali.  The obesum bit refers to its fat, swollen base - which make them a very attractive, sculptured pot specimen.  The fat belly, in common with a lot of succulents, is for storing water through naturally dry periods - that's why it doesn't need too much watering in the winter - the driest months where it comes from.

HOW:  Their origins also tell you a lot about how to look after them.  They require frost free, little watering in the winter, protection from harsh weather and regular watering in the summer - typical tropical weather - and they like to be warm.  They make a fine specimen garden plant - just make sure you give them a free-draining soil.

POTS:  If you are going to plant them in a pot, make sure that you don't bury any part of its fat belly - it will probably rot if you do and you will miss seeing it's belly getting fatter as it grows! While they can get to 2m in the garden, they will stay smaller in pots and have a very interesting bonsai look about them.

PROPAGATING:  Now this is where it gets really interesting.  Plants grown from cuttings tend to be a bit straggly looking and Adeniums are generally grown from seed.  I was thrilled to see that my plant (well, my husbands') had set two long seed pods last year and I was filled with anticipation as to what was going to happen next.  After what seemed an eternity, they finally split open and revealed the most fairy-like seeds, with a silken tutu at each end.
They were almost impossible to photograph as the slightest puff would set them floating in the air.  They were just so enchanting, and incredible beautiful.  I had a happy few moments flitting around trying to round them up!
Adenium obesum seed

This story is to be continued as I have planted them, and they have sprouted.  Like all children, they will be versions of the parents but not identical - I may get a white one or an all red one - and, I might finally get to have a plant of my own!


Tuesday, October 29, 2013

Citrus: When and how to Feed

Potted oranges and lemons

I once read a survey in an Australian landscaping magazine that listed the top five things you could expect to find in the average Aussie backyard - they were: a barbecue; a Hill's Hoist (washing line); a dunny (outside toilet); a dog and a lemon tree.

It tells you a lot about Australians and their way of life - and that gardening is not top of their list!  However, I'm fortunate that my life as a horticulturist in Australia has been full of gardens and wonderful gardeners, and their passion for citrus trees is evident (not just the lone self seeded bush lemon tree!).  Citrus are always top of the clients' 'must have' list and questions about citrus always outnumber any other gardening questions.

In previous posts about citrus I have discussed pruning and planting, caterpillars on citrus and how to deal with common pests (scale, sooty mould and aphids).

Lastly, I'm going to tell you how to recognize nutritional deficiencies in your citrus trees and what their feeding requirements are.  When it comes to giving citrus tender loving care there are a few basic principles - one of the most important is adequate nutrition - CITRUS ARE HEAVY FEEDERS.

WHEN:  Citrus have very shallow surface-feeding roots and require fertilizing three times a year in July, November and March.  This is particularly important in areas of heavy rainfall where the soil rapidly becomes depleted of nutrients.  That's why it is also important to mulch them out to the drip-line to minimize soil run off and help maintain the nutrients in the soil.

DON'T feed the soil while they are in flower otherwise you will have a lot of leaves and no fruit.

DON'T OVERFEED - especially with nitrogen or you will end up with a lot of overlarge and thick-skinned fruit.

WHAT:  Citrus are heavy fruiters and take up a lot of the essential macro and micro nutrients out of the soil - they require the lot LITTLE and OFTEN.  Potassium (potash) is essential for flowering and fruiting and a natural constituent of seaweed - that's why regular feeding with a compost tea, that contains seaweed, or a seaweed concentrate is a good option for citrus.  I would recommend the following mixed with 4.5L water for the three times a year feeding regime.  Water in this mix around the drip-line of the tree - that is where the feeder roots are.

  • 3 tbs seaweed concentrate
  • 1 tsp trace elements
  • 2 tsp iron chelates
HOW:  Signs and symptoms of common nutrient deficiency:
Iron - a common deficiency in citrus with dieback of the new growth and intra-veinal mottling of the leaves.
Iron deficiency of citrus leaves

Nitrogen - Overall pale yellow leaves and lack of vigour.  This is not to be mistaken for 'winter yellowing' where some of the leaves will turn yellow in the winter because the nitrogen in the soil is unavailable to the plant in cold and dry soils.  The leaves will turn green again with the spring rains.

Nitrogen deficiency of citrus
Zinc - Yellow tipping of leaves.
Copper - Dieback and dry patches inside fruit.
Manganese - Intra-veinal mottling and lumpiness of leaves
Magnesium - Very common and similar in look to iron deficiency ending up with a triangular patch of green at the base of the leaves leaving the rest yellow.


A NOTE ABOUT CITRUS IN POTS:  Citrus have always made fantastic pot plants and have been grown this way for hundreds of years with large green house conservatories or 'orangeries' a part of a lot of the stately homes of Europe, where the potted citrus would be wheeled inside to overwinter.

The roots of citrus in pots cannot go foraging for water and nutrients and require particular attention to keep them looking as healthy as the orange tree in the above photo.  Enough water, but not too much and the right kind of food, but not too much.  I would still recommend the above recipe three times a year with extra monthly waterings of a weak compost tea or worm juice drink.

  • Choose an open and sunny spot to plant them - out of the wind.
  • Mulch out to the drip-line.
  • Feed regularly - not forgetting the essential trace elements.
  • Prune to shape regularly.
  • Ensure they are getting adequate water - particularly when the fruit is setting - dry plants mean dry fruit.


Friday, October 25, 2013

Feta Cheese: Making Your Own!

Homemade feta marinated in olive oil

With a good source of fresh milk I have recently been venturing into the wonderful world of home cheese making - something I have always wanted to do but thought it would really be too complicated to try at home - not so.  This is apart from the fact that I adore cheese and one of the joys of traveling is getting to try new varieties.

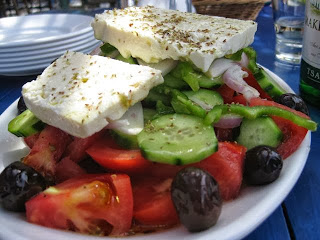
People talk about the romance of the vine and wine making, but I think there's a lot in the romance of the 'rind' - cheese-making - the sources of milk from a wide variety of landscapes, the family traditions, recipes and love that goes into the making of cheese.  Where would a good Greek salad be without a big slab of feta cheese on top of a glistening bowl of tomatoes, cucumbers and olives, drizzled with local olive oil and sprinkled with herbs?


This all started with making my own yoghurt, and from that labneh and ricotta. So when I saw this recipe for home-made feta by Matthew Evans, that included raw yoghurt, my eyes lit up. It does take a while, but you don't have to watch it all the time - it's really about the alchemy of beneficial bacteria (as in yoghurt making) which do take a bit of time to work but, believe me, the end result is worth it.

WHAT YOU WILL NEED: A thermometer - just a simple one with a prong that clips onto the edge of the saucepan.  Sterile implements and bowls - this is where a dishwasher comes into its own - everything gets washed thoroughly and then heated while they are drying. Clean piece of muslin (cheesecloth) or use a brand-new Chux.

3 litres unhomogenised milk
1 1/2 tbsp live natural yoghurt
1/8  tsp rennet OR 3 junket tablets whisked into 150ml boiled then cooled water 
2 tbsp salt

NOTE:  Matthew Evans states that he had varying success using junket tablets, but I found they worked just fine - as you can see!.  The only way I could lay my hands on rennet was by ordering it on line and I just couldn't wait however, junket  - being an old fashioned milk coagulating desserty thing, is readily available in my country town mini-supermarket.  I remember in my Domestic Science classes at school having to make junket as part of an 'invalid meal' - like yoghurt, it's easy to digest.

1.  Heat the milk in a large saucepan over a low flame until it reaches 32C.  You need to keep it as close to this temperature for about an hour so put straight away into an Esky or insulated bag.  Put a wad of newspaper on the bottom because it the pan will be hot, then zip it up.

2.  After one hour, add the yoghurt and whisk it through the milk.  Put the lid on your pot again and zip it up for another hour.

3. Whisk the rennet or junket mixture to the milk and then stop the milk from moving with a large spoon (you need the milk mix to be completely still while the rennet is working).  Cover again and leave for 8-12 hours, or overnight.  Do not disturb during this time.

4.  Once the curds are set, use a long knife to cut the curds into squares and leave to sit for ten minutes.

5.  Line a colander with a layer of muslin leaving enough to cover the top of the cheese, drain the curds through it and wrap the cheesecloth over the top.


6.  Put a plate on top that will cover most of the cheese and top with about 1kg of weight - I used a couple of cans of tomatoes. Stand back in the saucepan on top of an inverted little dish so that your cheese is sitting up above the strained whey. Refrigerate and leave for 24 hours.
7.  To make the brine solution, mix together the salt with 1 litre of water and stir to dissolve.  Cut the cheese into squares, place in sterilized jars, top up with the brine and leave for a day or two before using.  Will keep for a couple of weeks in the fridge.

NOTE:  Brining the cheese 'hardens' it up and gives it that distinctive feta characteristics.  If you want a softer, milder cheese, strain from the brine after a couple of hours and keep by covering in olive oil.  You can also add some lemon peel/garlic/herbs/chillies etc. - I just love marinated feta for breakfast and lunch and then add to salads for dinner.  Ideally, I would have marinated this in a lighter olive oil, but the extra virgin was all I had - it just gives a stronger taste.


This cheese left unbrined is very similar to Greek manouri cheese. I had a delcious salad of this on the island of Skopelos (where they made the film Mumma Mia). The cheese was grilled until lightly golden and then placed on a bed of wild rocket and cherry tomatoes with a dressing of reduced balsamic.  At home in Mullumbimby, all I had to do was put on 'Dancing Queen', eat some of this yummy cheese and I was right back there.

NOTE: This is a very economical cheese to make at home.  3 litres of milk made 800g of feta.
Anybody reconize this church?