Friday, May 27, 2016

Top Plant: Turmeric

BOTANIC NAME: Curcuma domestica
COMMON NAME: Turmeric, Curcuma, Indian Saffron, Yellow Ginger, Karmin 
FAMILY NAME: Zingiberaceae
ORIGIN: SOUTH EAST ASIA


Curcuma domestic in flower in the middle of summer.  This is the plant that has the yellow ginger root from which we derive turmeric powder - the aromatic curry spice.

Just about every where I turn these days I am hearing about the benefits of turmeric and tonight, when I had the family for dinner, both my son-in-law and daughter came in with a recipe for 'turmeric chai' or 'turmeric milk' espousing the health giving benefits of this yellow spicy ginger. (See below for recipe)

So what is it all about?  It's definitely time now for me to get down on paper what I know about this wonderful plant - wonderful for it's health giving properties and its use as a landscaping plant in the sub-tropical garden.

Freshly dug turmeric
Description
A perennial plant of the ginger family, native to India and parts of Asia.
Propagated in spring from knobbly roots, called rhizomes, which have thick, finger-like side-shoots. Leaf stalks rise to 1 metre or more high. Vibrant green leaves are lance-shaped. Floral spikes 20cm long, with thick clusters of pale green pockets with creamy/yellow foxglove-like flowers peeping out of each pocket, and a mild spicy aroma.

When to harvest: The leafy parts of the plant begin to yellow and die down in autumn - this is the time to harvest the edible yellow rhizome.  If you leave it in the ground it will re-shoot in the spring with the clump increasing in size over time and the turmeric root becoming more yellow and aromatic - that's why I usually harvest it after the second year when the flavour and colour has intensified.

Uses in Landscaping: It's a great addition to any sub-tropical garden with its lush green spear-like leaves and striking delicate flowers.  There is also a pink-flowering variety that is native to Australia with a very attractive red stripe up the mid-vein of the leaves.

It's happiest in moist, rich soil away from the intense heat of the midday summer sun.  Just remember where you have planted it so you don't crowd it in with taller plants that will hide its' loveliness when it pops up again in the springtime.

Curcuma australasica - the native Australian variety.  I haven't tried eating the root, but I'm sure you can, but it is not yellow.

Preparation


This is a job for some sunny weather!  After digging up your turmeric clumps you have to give them a good wash to get all the soil off and trim off any roots and stems.  The fingers of turmeric will easily break off from the main stem.  Leave them to dry in the sun before you cut them.  Then, you simply slice them up and put them on baking trays out in the sun.  You will have to turn them over a couple of times.  When the turmeric slices have dried completely they shrink dramatically, usually after a couple of days.  I then use my electric spice grinder to turn it into powdered gold!  It's very easy.


Health Benefits
First, let me say that this 'new' blockbuster nutrient is actually really old and has been an important part of the diet of Sub Continental and South East Asian cuisines for centuries - where would any curry be without turmeric?

NOTE: On my frequent travels to Indonesia,where I have been the guest of a family, they always have a jar of turmeric jamu (medicine) in the fridge - which consists of grated fresh turmeric, fresh lime juice, honey, water and often fresh chilli.  This is left to intensify for a few days and then a tablespoon of the liquid is taken with water.  This is their all round, every day tonic. 

Turmeric is recognised as being an anti-inflammatory, anti-fungal and anti-bacterial compound. 

In addition, as a recognised powerful antioxidant  current research is showing help with everything from heart disease to Alzheimers.  

"It is a possible aid in preventing chronic degenerative diseases like Alzheimer's disease."

"In fact, the high intake of turmeric in the Indian diet has been attributed to their rates of Alzheimer's disease, which are amongst the lowest in the world". Professor Marc Cohen, head of Complimentary Medicines at RMIT quotes from his latest research.  He also has this to say:

"Omega 3s in turmeric, with its active ingredient curcumin, are "blockbuster nutrients", 

"Turmeric is a powerful antioxidant which stops lipid oxidation and is anti-inflammatory," 


Cohen, who suffers from osteoarthritis, is such a fan of the spice that he takes it daily.

Another recent article in the Guardian quotes new scientific studies that also confirm that the anti-inflammatory properties of curcumin was more effective in treating rheumatoid arthritis than prescriptive anti-inflammatories. 


Importantly, it has also been found to inhibit the growth of cancer cells.

NOTE:  From all the current research that I have read it is stressed that taking turmeric in its natural state, either freshly grated or in its powder form, is far more effective than taking it as a manufactured supplement.  You have to eat your way to good health and not expect it from a pill because the benefits and complexities of whole foods, and how the body metabolises them, is still in the early stages of scientific understanding.

To quote Cohen again: “A key challenge we have faced in the past is how to ensure curcumin is absorbed into the body to provide therapeutic benefit.” As well as using it in curries (where it is responsible for the yellow colour) and smoothies, he often has it with milk as the fat, he explains, helps absorption.


"I believe whole turmeric is more effective than isolated cur cumin for inflammatory disorders, including arthritis, tendonitis, and auto-immune conditions."

Taking the natural-first approach, is also backed up by Melanie McGrice, spokeswoman for the Dietitians Association of Australia.


"I think it's always better to try natural food sources before turning to medications," she says. "Turmeric certainly has a lot of health benefits, especially because it is so rich in antioxidants."

Golden Milk: As effective absorption from the gut has been one of the issues with turmeric's abundant benefits, and an understanding that fat assists with this, 
trendy cafes worldwide are now offering 'ginger chai' or 'golden latte' with a similar recipe to the one below.  Golden Milk or haldi ka doodh has, in fact, been used in Indian natural medicine as a winter drink to heal coughs and sore throats for longer than big beards and hipster baristas have been around. 

An anti-inflammatory Ayurvedic healing cuppa.
½ teaspoon of turmeric (fresh grated or powder)
½ teaspoon of fresh grated ginger
2-3 peppercorns
2 cups of milk
Spices (optional) cardamom, nutmeg, cinnamon, cayenne pepper
Honey to taste
Combine all ingredients except the honey in a pot. Simmer for 2-3 minutes. Strain. Add the honey once the mixture has cooled a little.

I have a bung knee so I'm off to boil up a golden brew!


My home grown turmeric powder

Saturday, May 21, 2016

Poached Oranges in Honey Syrup


I've just picked the first of this year's crop of sweet and juicy citrus from my garden and am reminded that this is one of the many delights of enjoying seasonal harvests - as the weather cools, a changing variety of foods become available and we can look forward to putting different dishes on the table - less salads and more hearty soups and casseroles - and yummy desserts using citrus.

Eating foods that are in their natural season and grown in the soil are always going to be more nutritious and taste better than foods grown artificially.  My youngest daughter, who lives in Sydney, is coming up for a holiday this winter so we have decided to do a Christmas in July for the whole family with roast turkey and the whole shebang - I can almost taste those roast parsnips, sautéed Brussels sprouts and chestnut stuffing - this just does not work in the middle of the Australian summer when it is boiling hot. I am cajoled
into cooking the turkey roast every year, usually just wearing a sarong with the fridge door open to keep cool,  but I long for a cold Christmas when we can enjoy a hot dinner and when the traditional foods are in their proper season.

It also occurs to me that is probably not just a coincidence that citrus season accompanies the coughs and colds winter spell - just when we need higher doses of Vitamin C and citrus goodness.

These poached oranges are very quick and easy to make and a great way to enjoy their sweet and tangy juiciness.  This dish owes its origins to Mediterranean cuisine where laden orange trees drip over old stone walls and line the streets of cities like Athens -  and where citrus are served every which way for desert.


Homemade preserved fruits in our local coffee and cake shop, Sifnos Island, Greece

It's great to have a standby dish of these in the fridge to have with yoghurt for breakfast; jazzing up a piece of afternoon tea cake or for desert with ice-cream - In their syrup they will keep for over a week.  
TIP: This is a very refreshing dessert to have after a spicy meal.

Recipe
1 kilo sweet and juicy navel oranges.  It's important to use navels because they don't have any pips and stay firm when you slice them.
2 extra oranges, juiced
1 lemon, juiced
2 tbsp honey ( you can use white sugar)
1 cup water

Method
1.  Put juice of oranges and lemon, honey and water in small non-reactive saucepan.  Bring to boil and simmer until syrupy and liquid is reduced by about a third.
NOTE:  Using honey instead of sugar gives a more floral flavour.

2.  While the syrup is simmering peel the oranges making sure you remove all the white pith otherwise your finished dish will be bitter.
NOTE:  I find the best way to peel oranges like this is to get a flat chopping board (not one you use for garlic!), take a slice off the top and bottom - you don't want those bits anyway -  so that they stand flat and with a sharp knife slice the peel downwards towards the board.

3.  Slice the oranges into thin rounds and place in a glass or ceramic dish.

4.  Wait until the syrup is completely cooled then pour over the orange slices through a fine strainer. Refrigerate before serving.


Poached Oranges in honey syrup with Ricotta Cheescake and homemade yoghurt.

Monday, April 25, 2016

Gardenias - Which One to Plant and How to Care for Them?

BOTANIC NAME:  Gardenia
COMMON NAME: Gardenia
FAMILY: Rubiacae
ORIGIN: South East Asia and South Africa


Gardenia magnifica

(Hallelujah! - One of the few plants with a botanic name that is the same as its common name AND it only has one of those - gardenia)

WHAT:  Gardenias are rightly among the most popular plants in Australian gardens (they certainly are in mine - I have four varieties) grown especially for their glorious white, perfumed flowers and evergreen, glossy leaves.  The added bonus, for us gardeners, is that they come in a variety of heights and shapes - which means that there is one for every spot in the temperate garden, making them among the most useful of landscaping plants.

Gardenia radicans The lowest growing of the gardenias that rarely gets above 50cm. which makes it very useful for edging, borders, rockeries and courtyards.  The leaves are small, pointed (narrow elliptic) and evergreen.  It flowers profusely - mostly in November and December with fragrant irregular white blossoms.
TOP TIP:  The radicans part of its name means 'with rooting stems' which means that it is very easy to propagate this variety from its side stems which readily throw out roots - you simply cut off the rooted stem and plant it.


Gardenia radicans in flower and used here, to great effect, as a border for these steps in this Asian style garden


Gardenia augusta This is a medium sized shrub - more wide than tall 2m x 1.5m.and a great evergreen 'filler' for the sub-tropical garden. 

The most common varieties are 'Professor Pucci' and 'Florida' (a variety of which is a ghastly thing called 'Golden Magic' the flowers of which turn from their gorgeous creamy white to a sickly yellow as soon as they open).  Known as the florists gardenia augusta makes a wonderful cut-flower and has an extended flowering season, throwing out blossoms throughout the summer with it's peak through November and December.  Leaves are small and a lustrous dark green that are paler beneath.  It's easy to keep this plant small, but it does require regular pruning.

Gardenia augusta


Gardenia magnifica  The queen of the gardenias (photo of flower at the top of the page) A taller shrub, which will get to over 2m if you let it, with glossy leaves and the most beautiful matt-white perfumed flowers.  It doesn't flower as profusely as the other varieties, with its main flowering time before Christmas.  I find that they prefer a little less light - happy in the morning sun with filtered light in the afternoon, whereas the radicans and august as will tolerate full sun - but not the hot afternoon sun from the west.

This plant in my garden was over 2m tall and  looking pretty sick - leaves turning yellow and falling leaving mostly bare stems.  I couldn't find any sign of pests or diseases.  What did I do? Cut it right back, fed mulched it and hoped for the best. This was a couple of months later.


TOP TIP: I am writing about gardenias now because, while they have their main flowering flush in early summer, they will keep popping out the odd flower throughout the warmer months .  They have just had their last dash so NOW IS THE TIME TO PRUNE THEM.  

Big mistake people - don't let the stems get long and leggy like this, PRUNE THEM - and don't do it when most people do, in spring, because you will be cutting of the developing flower buds.

Because gardenias flower on the current seasons' growth you will get more flowers if you prune them because pruning creates a multitude of side shoots that increase the flowering potential.


The above photo shows a Gardenia augusta in my neighbour's garden (sorry Dixie!).  What do you think this plant is crying out for?  1.  A haircut - note the leggy, bare stems. and 2. A feed - note the pale, yellowing leaves.

COMMON PROBLEMS:  There are two reasons why gardenias do so well is the sub-tropical garden and both are related to their origin - they come from the sub-tropics, from the edge of pine forests with inherently slightly acidic soils - as are ours (5.5-6pH) - so generally they are going to be quite happy in conditions that mimic their place of origin: a warm frost free spot, humidity and a slightly acid, rich soil.  Without this they may struggle - round pegs and square holes people!


1.  Plant generally pale green with yellowing leaves - (not to be confused with NORMAL winter yellowing of some lower leaves)  If you look at the plant in the above picture, you will notice an overall pale green colour with quite a few yellow leaves.

SOLUTION:  Give the plant a dose of Epsom Salts (magnesium sulphate) - gardenias quickly become deficient in magnesium, mulch it (they like cool roots) and feed it at least three times a year with a slow release organic fertilizer.  All of this will correct any pH problems and feed the soil with all the nutrients that these plants require.  


2.  Scale and sooty mould -  the waxy dots on the mid-rib of these gardenia leaves is a SCALE - a SAP SUCKER and a common pest of gardenias.  Note the ants all over the leaves.  ANTS and SCALE live in a symbiotic relationship - clever critters! The ants give the scale a piggy back to a new plant (scale can't fly), to feed off honey-dew that is exuded by the scale after it has sucked the life out of the new leaves, leaving them weakened and unsightly.  If you have noticed a BLACK SOOTY coating on the leaves  - this is a mould (that gets transported in the air) that lives off any excess HONEYDEW after the SCALE and ANTS have had their dinner.
SOLUTION: A simple, non-toxic, home-made eco oil - don't reach for the spray can!! (Click here for the whole story about SAP SUCKERS and how to control them).  Just mix this up in a spray bottle, give it a good shake and spray on affected areas - this smothers the scale - problem solved. Repeat as necessary.
3 tbsp cheap cooking oil
4 drops washing-up liquid
1 litre warm water


Infestation of caterpillars in the growing tips of gardenia

3.  Bud worm - damage to the growing tips of the plants and flower buds can be caused by a wide range of winged insects that lay their eggs on the gardenia and when they hatch the larvae (caterpillars) eat the juicy new bits.  I had noticed this recently on most of my gardenia bushes with tell-tale chewed shoots and leaves and webbing all over the growing tips.
SOLUTION: I am reluctant to reach first for any kind of control of garden insects, knowing that infestations are usually indicative that the plant is under stress - they are a bit like us, when we are run-down we get sick too.  Importantly, I didn't know how this critter fits in to the life cycle of other species.
1.  First of all I tried pruning all the bushes and cutting off the affected areas.
2.  When some persisted I sprayed the affected areas with Dipel - a non-toxic biological control of caterpillars.

 PROPAGATION:  
1.  Gardenias are relatively easy to propagate from semi-hardwood, leafy tip cuttings with a heel of older wood - in other words, a stem tip that is not entirely green and beginning to turn brown. Cuttings are best taken in autumn and winter - makes sense to do it after you have pruned them - you have lots of propagating material! - and strike in a mixture of sand and compost.  For a detailed explanation of how to do this, go to this link.  I have four magnifica bushes in my garden, all growing from cuttings from of a bunch of gardenias I received about 12 years ago - it's that easy!
2. Refer to Gardenia radicans.  Their ability to throw out roots from side shoots is not unique to this little fella - all gardenias will do it.  Simply find a side shoot close to the soil, weigh it down with a stone, or peg it with a piece of wire, cover in nice moist soil and mulch and leave for a few weeks.  When it has grown roots, you simply cut off that stem and plant it.


You've got to love a plant that is named after a chap named Garden?  Carl Linnaeus, the Swedish botanist (1707-178) and father of binomial nomenclature - the bloke who set about naming all plants and animals in a standardised and logical way - named the gardenia to honour Alexander Garden (1730-1791) - a Scottish physician and amateur plant collector who left his chilly homeland for the southern states of the USA where, I suspect, he saw gardenias for the first time and fell in love with them too?

Friday, April 15, 2016

Rose Petal and Rhubarb Jam

If you have never tried this you are in for a real treat - just opening the lid and smelling the wonderful fragrance of this jam is enough to have you running for a slice of fresh, crusty bread and butter.


I was prompted to make this yesterday because my adult son and daughter are taking a short break to visit their grandmas in the UK - my mum is 87 and my mother-in-law is 97 - and my son hasn't been for nearly 30 years and my daughter for 20.  What better than a jar of homemade jam to take for them - just hope they can fit it in when we take them to the airport this afternoon!

Traditional in cuisines of the Levant - eastern Mediterranean, I first tried this jam this whilst we were staying in an old Venetian villa on the Greek Island of Folegandros - it was made by the owner's grandmother and had me determined to try it for myself when I got home - it was so delicious.

Recipe
Young, plump rhubarb (about 1 kilo)
White sugar - same amount in weight as the rhubarb
About 400 g fragrant, fresh, red rose petals
Juice of 2 lemons

Method
1.  Wash the rhubarb and cut into one-inch pieces and place in a large, heavy bottomed saucepan.

2.  Sprinkle with the juice of the lemons and cover with the sugar.  Cover and leave to stand overnight.  DO NOT ADD ANY WATER.

3.  The next day, stir in the rose petals and bring to the boil.

4.  Do not reduce the heat but boil rapidly until setting-point has been reached. It will need to occasional stir to stop it sticking and burning.

5.  Remove from heat, cool slightly and pot in sterilised jars.  Seal when it has cooled.


NOTE:  Leaving the rhubarb overnight, covered in the lemon juice and sugar, helps to draw the moisture out of the fruit - repeat, YOU DO NOT NEED TO ADD WATER - if you do, it won't set.

This is what it looks like in the morning after sitting overnight - notice how much fluid is in the pan?


WHAT KIND OF ROSES TO USE:  
Any fragrant, old-fashioned kind of rose will do.  I used Papa Meilland because I have it growing in my garden.  "Roses in the sub-tropics" you might ask, but there are many that do well - specifically those that come from the sub-tropical parts of China - like this tea rose.  It has a long flowering season, sensational dark red colour and heady fragrance.


Talking about tea - time for a cuppa anyone and a slice of bread and jam?

Monday, April 4, 2016

Red Mullett: Eating Fresh for Less

Concerned about the sustainability of the fish we eat?  Look no further than the mullet - particularly the red mullet - a prized fish in the Mediterranean that sells for peanuts in Australia and then when you eat it you will see why barbounia is one of the most esteemed  eating fish in Greece.

Greek Island of Sifnos - where I first ate barbounia

This is one of my favourite spots in the whole world - a wonderful walk through the herb scented hillsides, along ancient Byzantine pathways - and then a divine dip in this beautiful water!


Red Mullet - Barbounia in Greece

RED MULLET:  I made a surprising find yesterday that made me very excited.  The Brunswick Heads Fish Co-op had fresh red mullet for $6.00 per kilo - yes, that's right folks - six bucks!  This is the most prized fish in Greece that you can pay about 50 euros ($100) per kilo for - they call it barbounia and generally cook it whole.


 Cherronissos Taverna, Sifnos - a red mullet experience!


I love fish, and all things from the sea, but the cost can be prohibitive - have you bought any salmon lately?  An article in Good Living last week (food supplement of the Sydney Morning Herald) was encouraging consumers to steer away from the costly popular varieties of fillet fish (like salmon, barramundi, tuna and jewfish) and adventure into the world of lesser known species (and mores sustainable) - and buy them whole - like our friend the red mullet.

So, after buying it from the Brunswick co-op the test was going to be; 1. Would it taste the same as the wonderful ones we had in Greece?, and 2. Would I be able to cook it the same way (I am not a good fish cook)?

Fresh local mullet from Brunswick Heads - $3.60!

I did my best!  Leave the heads on, gut them and give them a light dusting of flour then cook in hot olive oil for a minute or so on either side. I always cook fish outside on the burner of my barbecue (the smell!!) - so this was another 'torch job' in the dark and cold.  It was worth it - they were delicious with just a squeeze of lemon, thick-cut fried potatoes and a fennel salad.  The verdict from him - tops!!  Put it on the blog!!  As for me - well, just for five minutes I was back in Sifnos.

NOTE:  Like eating whole sardines and anchovies, you simply pick up the whole fish and eat the flesh off the bone - then leave the skeleton on your plate!  This is a relatively stress free experience with barbounia because it doesn't seem to have a lot of 'floating' small bones.

Fennel and Fish have always been good partners as it's digestive qualities help to counteract the strong flavour and oiliness of some fish - like salmon and mackerel.  It has always been popular as flavouring in fish soups and, along with lemon, in stuffing large fish before baking.  Go to the post about fennel.

Sifnos has 365 chapels and churches - one for every day of the year - this is one of them!

NOTE: Another surprising and delightful find this week has been the blog written by Maria Verivaki from Chania, Crete called Organically Cooked.  I found it while looking for the recipe for an amazing squid and potato dish that we had in Crete flavoured with fennel - I have put a link to it in the sidebar - and she has sent me the recipe - to be continued.  She has lots of wonderful Greek recipes.

NOTE:  Nicholas Culpepper is one of the most famous herbalists that ever lived and wrote the 'bible' for anyone interested in herbs Culpepper's Complete Herbal.  He just happened to live a very long time ago 1616-1654 and published his famous book in 1653.  Here's what he had to say about fish and fennel:

"One good old fashion is not yet left off, that is to boil fennel with fish: for it consumes the phlegmatic humour which fish most plentifully afford and annoy the body with.  I suppose the reason of its benefits this way is, because it is an herb of Mercury and under Virgo, and therefore bears antipathy to Pisces.  Fennel is good to break wind, to provoke urine, and ease the pains of the stone and helps to break it."  So there you go - from the horses mouth, so to speak


Sifnos, an outdoor oven with a view!

Saturday, March 26, 2016

Green Papaya Salad

Green Papaya Salad

This is another one of those fabulously adaptable dishes that seems to be a real favourite with everyone - including me! (I actually start salivating when I think about this salad!!)  Depending on what I have in the garden/fridge/larder it turns out slightly differently every time I make it, which fits in with my cooking credo; what can I make with stuff I already have?

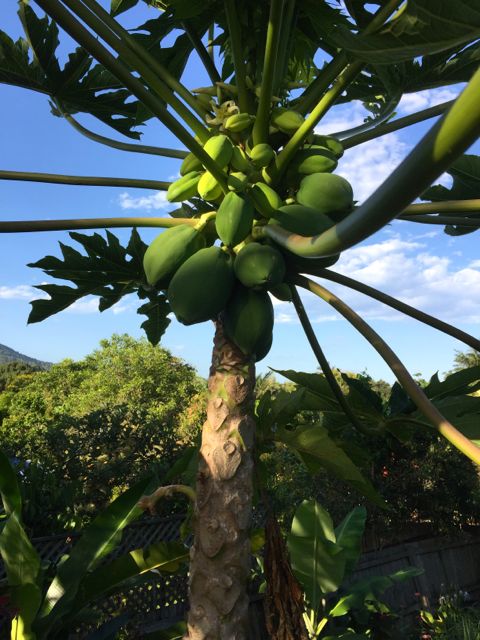
Carica papaya

If I can tick off the green papayas, lemon grass, makrut (kaffir) lime leaves, chillies, mint, Thai basil, I am already nearly there.

Traditional in South East Asian cuisine it is ideally suited as a herb filled summer salad for it's crunchy freshness with pungent sour/sweet/salty dressing and hint of chilli.  I like to serve it with barbecued star anise chicken and coconut rice with some home made pineapple oil pickle - delish!

Recipe

NOTE:  What you will need, to make your life easier when making this salad, is a speed peeler and julienne shredder - how did I ever live without them?  Use these to peel and shred the papaya and carrots.  Ordinary graters make them mushy.


  • Shredded green papaya, skin removed
  • Handful of fresh chopped coriander and mint
  • 2 makrut lime leaves finely shredded
  • 1 lemon grass stalk, white part only, finely shredded.
  • 1 cup shredded carrot
  • Fresh red chilli, de-seeded and finely chopped - to your own taste
  • 1 cup fresh bean sprouts
  • 2 spring onions, finely sliced (optional)
  • Few Thai basil leaves (optional)


I topped this version with ribbons of toasted coconut
Topping
1/2 cup desiccated coconut and 1/2 cup raw peanuts tossed in a wok until golden then chopped together.

Dressing
Juice of 1 large lime
1 tbsp fish sauce
1 desert spoon caster sugar

Toss all salad ingredients together in large bowl.  Top with coconut peanut mix and pour over combined dressing.
I added some fresh mango and shredded cos lettuce to this one - do you get the idea?


Health Benefits:  There's more - this has to be one of the healthiest salads you can eat.
Calories green papaya: only 45 per 100 grams
Digestion:  Green papaya has long been known in traditional cultures as a digestive aid.  High in fibre and enzymes it aids bloating and constipation and helps to correct gut imbalances.
Nutrition:  Papayas are a good source of folate, Vitamin A and C, magnesium and pantothenic acid.  They also have B vitamins, alpha and beta carotene, lutein, zeaxanthan (helpful in the prevention and treatment of macular degeneration), Vitamin E, calcium, potassium, Vitamin K and lycopene - the powerful antioxidant most commonly associated with tomatoes.  (Source: Medical News today and Wikipedia)


Wednesday, March 16, 2016

Making your own cheese

Have you got a list of things that you really want to do in your life - well one of mine was to learn how to make cheese.   Apart from loving to eat cheese, it is my snack of choice, I am fascinated by the alchemy of the whole thing, of turning milk into such a wide variety of edible yumminess - for me, it definitely has that wow factor because there seems to be something quite magical about it.  And, so it would seem, this fascination is not unique to me - for wherever you go in the world where they keep cows, sheep, goats, camels, buffalo, they milk them and turn it into curds and whey, and then do all kinds of wonderfully weird things to it that gives us world of cheese that we know and love.  Imagine pasta without parmesan, pizza without mozzarella, cheese and pickle sandwiches with just pickle?

Funky blue I made - ready to eat five weeks after the class

I have been making my own yoghurt for many years and I suggest that if you want to get into the cheese thing - start with yoghurt and from this you can easily progress to labna, ricotta and feta.  Making yoghurt is really simple but you will learn three fundamental principles that will be a good foundation for your onward cheese journey: what happens when you put milk, naturally occurring good bacteria and rennet together, how to carefully follow a recipe and patience.

Ever eat junket when you were a kid - that nursery blancmange like pudding of curdled milk?  This was made by adding rennet to warm milk.  Rennet is a naturally occurring compound that is found in the stomach of ruminants and the first cheeses were said to have been made from the practice of transporting milk in these stomachs - it curdled it, and if left for a few more days, hardened and turned into cheese.


My granddaughter with a Jersey calf at the local dairy

Well, a chance meeting with local cheese maker, Deb Allard, at our local farmer's market, had me doing just that at one of her specialist workshops in Burringbar.  She is owner of the wonderfully named Cheeses Loves You and was putting on a days' cheese making session  for three lovely lads who were doing this as a gift to themselves for their fortieth birthdays' - and I was allowed to be the lucky ring-in!  She put on a fabulous lunch -  guess what we had?

Deb Allard with a fully matured stilton that she had made previously

In one day (in 35o heat!) we made brie, stilton, mozzarella, Persian feta, cultured butter and Jarlsberg, and everything, apart from the mozzarella turned out perfectly - it was still OK to eat but didn't get it's characteristic elasticity.

Deb says that is all down to the quality of the milk you use and it is best, for all cheese making, if you can get fresh unhomogenised milk that has been quickly pasteurised (this doesn't destroy the good bacteria).  However, on the day we used Norco full cream milk from the supermarket and had an amazing success rate.

I am lucky to have a local dairy where I can buy milk straight from the cows.  Notice the cream on the top - this is from a Jersey herd, and can't wait use this with some of the recipes I learned.

Milk from Jersey's have the A2 protein and has a higher fat content - because of this it is better for making curd and soft cheeses - like ricotta and brie.  Milk from cows with a lower fat content, Holstein-Friesian, is better for making harder cheeses - like gouda and jarslberg.  I'm going to go with my Jersey's and just remove some of the cream if I need to - then I can  use the cream to make delicious cultured butter anyway - which is a real win, win situation!


Seeing how it's done with teacher and pupils. Most of the recipes require that various stages in the milk/curd/cheese production be kept at a specific temperature for varying amounts of time - this is where diligence and patience come in.

Can you make cheese at home?  Most definitely yes!  You basically need fresh milk, rennet and a cool place to mature the cheese. You need to be able to control the temperature of maturing cheese so a small bar fridge would be ideal - if you haven't got a cave!  I had actually run my fridge right down of food at the time of the cheese making class so just altered the temperature accordingly.  We added a variety of cultures to make the different kinds of cheeses, that Deb provided, but there is lots of information out there for using naturally occurring bacteria to get the same result.  For example - the blue mould on old sourdough bread can be used to make blue cheese.  Take a look at David Asher's The Art of Natural Cheesemaking - it's very exciting!


They say that necessity is the mother of invention!  One of the things you do have to do, while the cheese is maturing - like this brie I MADE, is to keep it dry in the container.  Remember that this is alive - there are natural processes going on that will cause condensation from the cheese - so you have to keep it raised from the bottom of the container.  What better way than an old Barbie sun-bed?  Who would have thought that all that old crap that I still have from when my kids were little would ever come in useful? (You can buy plastic boxes that have a plastic trivet in the bottom - Decor brand).  You cannot imagine how thrilled I was to make a cheese like this, that tasted absolutely fabulous, at my first attempt.

Making feta at home in my kitchen
I'm not going to go into detail here about to make all the different curds and cheeses but do have a go - you won't regret it!. I have already posted before details about how to make your own yoghurt, ricotta and feta - so just go to the links.

When you have mastered the art of yoghurt, then book yourself in for a cheese making workshop with a professional - it's the best way to learn. Not only do you get the benefit of their expertise and experience, you pick up lots of useful tips,  you get detailed tried and true recipes, and you get to come home with an esky full of yummy cheese that YOU have made.

While Deb had all of the professionals' cheese making equipment it is possible to adapt your home kitchen without spending a lot of money - understanding the principles behind the processes is the key.


It's easy to make your own ricotta at home - then you turn some of it into this scrumptious home made baked ricotta - simply delicious!

Mix up 500g ricotta with 2 eggs, salt and pepper and some chopped fresh herb - I like marjoram.  Oil a ramekin dish and sprinkle some chilli flakes on the bottom.  Bake in 190o oven for about 25 minutes, until puffed up and golden.  When cool, turn out.  Will keep in the fridge for about 5 days.

NOTE:  Something for the trivia quiz.  The word for what happens when milk curdles from naturally occurring bacteria is clabbers.

Tuesday, February 23, 2016

My shark moment!

I love to swim - it has been part of my life for as long as I can remember. There's lots of exercise that I find difficult because of my dodgy back and knees, but I find swimming just fantastic and try to do some laps every day to keep the body and mind straightened out.  I also find swimming a great meditation; I love the daily baptism of plunging myself into the ocean and the suspense of gravity and noise when I am in the water - just me, my breathing, and the big blue.

Summer magic Brunswick River

Now, I know people who have seen the Jaws movie once and never gone in the ocean again - I have purposely never watched it. Those kind of folk often ask me if I am not either mad or scared to death every time I am out there for I love deep-water ocean swimming.  My reply is that it is a calculated risk and I have far more chance of being run over by a bus (I actually say that I know more sharks driving around in Mercedes, but best not to go there!).

Brunswick River

My local swimming spot is either Torakina Beach or the river at Brunswick Heads - it's a beautiful watery playground for everyone.  I have asked the Brunswick old timers about the risk of sharks in the river and their reply has always been the same, that it is too shallow and tidal and they have never seen one there, but that you do get them in the main part of the river that is deeper and calmer.

So yesterday found me doing my usual thing and striking out at high tide to do my laps in the river - swimming across and bridge to bridge.  It was a bit later than normal, 6.30pm, and not too many people about.  I was half way across when I heard some people on the bridge shouting and waving their arms and pointing behind me - I even heard a scream! I turned, and my heart sank, there was a large black shape in the water about two metres behind me.  In that instant, I knew there was not a lot I could do and panic stricken I swam as fast as I could to shallow water and basically just surrendered to my fate.   It was then that two black shapes surfaced beside me and I realised that they were dolphins - a mother and baby and, now I know that I really must be bonkers, because I carried on swimming and they came with me.

When the panic had subsided it actually became quite magical for every time they submerged and I put my head under the water, I could hear them talking to each other in squeak language.  The thought did then cross my mind that if there were dolphins in this part of the river, where I had never seen them before, there could also be sharks.  It was then I saw what they were probably after, a run of mullet, and I decided that it probably really was time that I got out of there.

Two of my granddaughters 5 and 6 enjoying the Brunswick River

My advice to those who would like to swim and either are afraid or can't get their rhythm right:
  • Get yourself a silicone swimming cap - it keeps the hair out of your eyes, makes you more buoyant, and your hair doesn't get messed up.  There is no way that I could swim every day if my hair got wet every time.
  • Buy some decent goggles that fit - it's important to be able to see and not be irritated by water getting in your eyes.
  • Pay for some swimming or stroke correction lessons. I do this every few years because, even though I am a good swimmer, we get into bad habits, or learned to swim such a long time ago that techniques have changed and the experts can give you tips that put less strain on the body.  For example - when I learned freestyle sixty years ago, the arm came right out of the water, straight like a windmill - hence the other name for it 'overarm'.  If you watch good swimmers these days they don't do that anymore - the elbow if just lifts up straight from the body before stretching into the water.  This puts a lot less strain on the shoulders, is more efficient, and you actually swim faster.
I have never had a swim that didn't make me feel better so I thought I would share with you some of my favourite swimming spots.

 You'll have to take my word for it on this one - me swimming with the dolphins Torakina Beach 2014
Poulati, Sifnos, Greece - magical walk through the herb scented hillsides from Ardomonis, along ancient Byzantine pathways to this crystal clear cove.


Adrina Beach, Skopelos, Greece (known to us as A Dreamer Beach, Skoffalot)

 Symi, Greece where I just flopped into the water from our lunch table


Komodo Islands, Flores, Indonesia on our way to Pink Sand Cove

Nissaki, Corfu, Greece


Victoria's villa, Ahmed, Bali in the shadow of Mt Agung

My best swim ever on beautiful Sifnos - from Chryssopigi monastery to the taverna on the beach in the fading evening light when the sky and sea became opalescent.


 Parsley Bay, Sydney where I taught my children to swim


The Ladies Baths, Coogee, Sydney


Bronte Baths, Sydney

 Number 3 grandchild, Nielsen Park, Sydney - still a favourite spot for swimming and picnics.


 Clovelly, Sydney

 North Bondi with my fellow ocean swimmers, Karen and Sue.  I still swim with them every Tuesday morning when I am in Sydney


Camp Cove, Sydney


Perhentian Islands, Malaysia - some of the best snorkelling I have ever done - live coral, wonderful fish and turtles.


Sarakiniko, Milos, Greece - very hard to beat this spot - it was magical

My Mum and Dad (in their 80's) at Torakina Beach - must be in the genes!