Sunday, September 2, 2012

Soil Nutrition: When, How and What to Feed the Soil?

This is a big topic and something that a lot of gardeners either think that they don't have to know or are just plain scared of!.  Let me just say that a basic grasp of this fundemental knowledge will help you to solve many of the problems that you will be faced with as a gardener - believe me, I know - I learned the hard way!  Bear with me because I have a BIT OF EXPLAINING TO DO.
Now,  now Flossie - I didn't say 'bare' with me!

It all started for me this week with an email from Peter - a member of our Garden Club who has undertaken an Organic Horticulture course at College.

"Hi Di, Enjoying the Organic Horticulture course. We're growing a large patch of veges of every kind and the growth rate is remarkable. No chemicals, of course, but I have been surprised at how many additives and amendments are going on -- compost, blood and bone, Organic Extra, sulphate of potash -- on soil that already tests really well. Crucially, it has large amounts of organic matter, thanks to regular plantings of green manure. And the compost, of course."  Peter

NOTE:  It was explained to me by Peter that they had spent the past few weeks planting out a large area with annual vegetable crops in the traditional farming practice of segregated rows.

This was my reply. Dear Peter,

Feeding crops. This is an interesting point you make and something I have been meaning to write up on the blog as people find it perplexing.

People always seem surprised when I talk about the necessity for feeding the soil - particularly if the pH is OK and they have improved it with OM. However, when you think about it it makes sense - especially when your are talking about veggies and fruit crops.


What you are doing at College is intensive farming with annual crops (that's what most vegetables are) even though you are doing it organically. You want them to do everything they have to do within a very short space of time - this is unlike the natural environment where plants are mostly permanent/perennial and there is naturally a great deal of seasonal variation in growth, flowering and fruiting - you have good seasons and bad seasons. What you are working with are probably also hybrids with expectation of larger than normal yields than would naturally occur in normal conditions.

In addition to this, you are probably growing a mixture of crops - leafy, root, fruiting that require larger inputs of nitrogen, phosphorous and potassium. Food for thought. I hope this is helpful. Kindly, Di


WHAT:You can get a grasp on this if you think of plants being like people - we need food, water and air to survive - without them we won't flourish - plants are the same.  We have OUR macronutrients (proteins, fats and carbohydrates) and we need larger amounts of them than our micronutrients (vitamins and minerals) - BUT THEY ARE ALL ESSENTIAL - in this respect plants are also the same - they have their MACRONUTRIENTS and MICRONUTRIENTS - they need them all to survive, but some in larger quantities than others.

OXYGEN, CARBON AND HYDROGEN make up 96% of these - which plants get from the air, sunlight and water.  

However, just as essential for healthy plant growth is the presence of a range of chemical elements that plants get from the soil - NITROGEN(N), PHOSPHORUS(P) and POTASSIUM(K).  Unlike us, plants can't go grazing for the nutrients they need, they have to be within their root zone.  In nature these elements occur naturally- provided by the soil and decomposing plant and animal material and, in the natural environment if these elements are scarce for some reason, plants evolve to survive without them.  For example - Australian soils are very low in phosphorus and many native plants will not thrive in phosphorus rich soils and you cannot feed them phosphorus rich fertilizers.

Nowhere in nature does anything exist like your vegetable garden.  This is an area of intensive crop production, and you are probably using the same piece of ground over and over again - SO THE SOIL AND PLANTS WILL NEED REGULAR FEEDING if they are to flourish.

The photo below is was taken of an experiment we did, when I was studying horticulture in the 1980's,  to look at the effect of these MACRONUTRIENTS on the growth of tomato seedlings.  I have never seen anything since that explains more simply the necessity of N, P, K on plant growth.  (All the plants were getting the same amounts of light, air and warmth)
Pot 1. C - Complete - this plant had all the N, P, K it needed. Note the healthy, normal growth.

Pot 2.  Had no nutrients at all - notice the stunted, poor growth.

Pot 3.  -N - no nitrogen.  The function of nitrogen is to promote strong, healthy leaf growth. Plants that are grown mostly for their foliage, such as leafy green vegetables, will require a fertiliser higher in nitrogen. If a plant's leaves begin to yellow there’s the possibility of nitrogen deficiency.

Pot 4.  -P - no phosphorus (phosphates).  This is responsible for the reproductive parts of the plant – the flowers, fruit and seeds and is also important in root development.
NOTE:  As a kid, on my father's alottment  I used to watch him put in a trench of wood ash next to where he was going to plant a root crop.  He didn't know that this would be ideal food for them - he had just watched someone else do it and seen the results.  Observation - one of the keys to successful gardening.

Pot 5.  -K - no potassium (potash) Essential for the formation of sugars, starches, carbohydrates, protein synthesis and cell division.  Enhances flavour, flowering and setting of fruit.

Other important elements are calcium (Ca), magnesium (Mg) and sulfur (S).  MICRONUTRIENTS are needed in small amounts like boron (B) which is needed by citrus to prevent fruit drop and to prevent hollow stems in broccoli.  Peas and beans won't thrive without molybdenum (Mo). 

HOW:  These Macro and Micro nutrients are present in the soil as part of the original decomposing rock and organic matter.  Replenishing the soil with plenty of organic matter is the most effective way to ensure that your plants are getting everything they need to eat!  Use whatever you have got to boost their supply; composted kitchen scraps, grass clippings, worm castings, animal manures, wood ash, urine, straw, seaweed ..................  
FACT:  ORGANIC MATTER is Natures' 'slow release' fertilizer.


How do these nutrients become available to the plants?  They are mostly converted by bacteria to a soluble form that is taken up by the roots of plants.  BUT THESE MICROFLORA IN THE SOIL ARE ONLY ACTIVE WHEN THE pH is right - that is NEUTRAL 6.5-7.  So it is important to check your pH (see top of main page (UNDERSTANDING SOILS).  All the food your plants need may be present in your soil. but unavailable because the pH is either too acid or too alkaline.

If you look at the diagram above (another of my College notes that I wish I hadn't chucked out!) you will see that the widest parts of the shaded areas indicate maximum availability of each element. The YELLOW BAND INDICATES WHEN ALL OF THE ELEMENTS ARE AVAILABLE - 6.5-7 with the MACRO NUTRIENTS, in particular, decreasing as the soil becomes more acid.  

WHEN:  Sub-tropical soils (and sandy soils) quickly become depleted of nutrients after heavy rain so our soils need feeding on a more regular basis.  The general ‘rule’ is to apply nitrogen, phosphorus and potassium at the beginning of the growing season to encourage vigorous growth, and again at end of the growing season so they go into their dormant period in a well fed condition.

Heavy rain also makes the soil MORE ACID because the alkaline elements in the soil are more soluble in water - they quickly get washed away.  That's why it's important to check the pH and correct any imbalance.  Mulch, mulch and more mulch!

One of the very best ways to 'quickly' feed a plant is to use a home made COMPOST TEA (see previous post) as a foliar spray - that is directly onto the leaves.  The plant is able to respond much more quickly to being fed by this method rather than via its roots and the soil. I give my fruit and vegies a feed this way about every ten days.
NOTE:  I make my COMPOST TEA from seaweed(kelp), comfrey leaves, and cow manure - this provides all the nitrogen, phosphorus, potassium and trace elements that my plants may need.


Six years ago I inherited this terrible clay 'pudding' - you can't call it soil.  I nearly wept.  The developers had scooped off metres of beautiful rich top soil to level it.  Everything struggled to live here, including me!

6 years later!
With the help of these and the other millions of micro and macro flora in the soil - they just need lots of organic matter to do the work for you.


"A cup of soil contains about 100 billion microorganisms. This is ten times the number of stars in our galaxy. Just a spoonful of soil contains about a billion microorganisms" ABC Radio National Science Show 5/3/2012  In our lifetime we will never know everything there is to know about the complex inter-reltionships of nutrients in either the soil or our own bodies. 

Wednesday, August 22, 2012

Milk: The udder story!

A couple of recent articles in the press got me thinking about MILK - a basic food commodity that we not only drink fresh, but make all sorts of everyday products like cheese, butter, yoghurt and cream - something we have been doing for thousands of years.  But, MILK apparently isn't MILK these days.

The first was a new survey which showed worrying levels of basic knowledge about agriculture, with students believing yogurt grew on trees and cotton socks come from animals.

The survey, commissioned by the Primary Industries Education Foundation (PIEF) and undertaken by the Australian Council of Educational Research with the support of Woolworths, reveals that 75 per cent of students in year six thought cotton socks were an animal product, while 27 per cent said they thought yogurt was a plant product.

The second was an article about how FRESH MILK is adulterated and is not exactly what you think - well, what I thought.
Fresh Jersey milk from our local dairy

FOR STARTERS: These days, look on the supermarket shelves – home delivery of milk having long since gone the way of many luxuries, including milk in glass bottles – and the range on offer is utterly bamboozling. There's skim milk, high-calcium milk, A2 milk, vitamin-enriched milk, soy milk, lactose-free milk, organic milk and much, much more.

FOR SECONDS: Nearly all milk sold today is actually a reconstituted product, often containing other dairy by-products.  This was news to me, but apparently has been going on for about two decades.  Milk is taken apart and put back together again so that it tastes exactly the same the whole year round in spite of normal seasonal variations - we, the consumer, apparently expect this! (I don't remember being asked about this in a telephone survey!).


FOR THIRDS: Ever wondered why people are becoming increasingly lactose intolerant? "Reconstituted" milk is perfectly legal, but most of this standardised milk contains a by-product from the dairy production process called permeate, which occurs when the milk proteins and fat are removed. Permeate has been used in Australian milk for about two decades.
Permeate can taint the taste of the milk and increase its lactose (milk sugar) quotient. It's high in lactose and if you are even mildly lactose intolerant, it might put you over the edge - so say the expert nutritionists.


According to Braeden Lord, CEO of Aussie Farmers Direct, "an unsustainable retail price forces processors to take short cuts to produce milk at a sustainable pricing level"

Up to 12 percent of your carton could be permeate. The MORE permeate mixed in, the less farm milk needed, the cheaper each bottle is to produce.

"Not only are the poor farmers getting the injustice of this, but consumers are unaware of the adulteration of the milk" says Lord.

From everything I have read the experts recommend the natural approach. "Ideally, choose milks that are as close to their natural state as possible."

I think it's worthwhile quoting Rene Redzeppi chef of Noma, Copenhagen Denmark - named No. 1 restaurant in the world for the third year in a row who works from a menu sourced from purely local ingredients.
"If the world is going to come to its senses, we are going to have to develop our own awareness and consciousness about terroir*.  The wheat we grow for the bread we bake, the beer that we brew and the animals that we breed"

I find these facts startling and thoroughly depressing - do you?  There was only one thing to do after this and that was to take the grandchildren on one of our regular outings to the local dairy with real COWS and real MILK where we can buy gorgeous, unadulterated, full-cream Jersey milk straight from the cow in our own recycled bottles. 

Where once a trip to the dairy was commonplace, it is now very unusual - I know that it certainly stopped in the UK when they went into the European Union in the 70's and food multinationals and 'government regulating bodies' have put paid to this practice in other parts of the world. 


Anyway, home with our delicious milk to make some yoghurt, cream cheese and a creme caramel - the farmer sells eggs as well - and they don't grow on trees!
*NOTE: Definition of terroir - "the complete natural environment in which a particular food (usually wine) is produced, including factors such as the soil, topography, and climate".

Yoghurt: Making your own is easy!

I love yoghurt and use it a lot in cooking, or simply eat it straight from the fridge with a big bowl of fresh or stewed fruit.  Yoghurt is a staple food in many parts of the world and it's not hard to understand why-it is just so versatile.  My friend Dennis, of Lebanese extraction, makes yoghurt every week with a culture (laban) that he insists his mother brought from Lebanon decades ago.  I'm not sure if it's true, but it makes a good story.

Freshly made yoghurt with full-cream Jersey milk

I'm not a big fresh milk fan, in fact I never drink it straight as it just doesn't agree with me, but with yoghurt  I'm fine.  This is because the bacteria that sets the milk into yoghurt curds (or 'clabbers' it!) converts most of the lactose present in whole milk into lactic acid.  That bacteria - Lactobacillus bulgaricus, Lactobacillus acidophilus and Streptococcus thermophilus are also beneficial in maintaining good gut health and are often recommended as a supplement to take after a course of antibiotics (which kills all the bacteria, good and bad).

Yoghurt is easy to make at home.  It just needs to be made with fresh milk and those with 'full cream' will make a thicker yoghurt - more in the Greek style.  It is best made in small quantities as it will 'set' better.  I always make it when we have made a trip to the dairy.

WHAT YOU WILL NEED:
1 litre full cream fresh milk
1tbs yoghurt 'starter' - any good cultured plain yoghurt
NOTE: Don't be tempted to increase the amount of 'starter' as it will make the yoghurt excessively sour
Container with a lid.  I use a glass Pyrex bowl that has a lid.

HOW TO MAKE IT:
Heat the milk in a saucepan until it is begins to boil and the froth rises.
Lower the heat and let it simmer for about two minutes - you have to watch it like a hawk!
Turn off the heat and allow it to cool to the point where you can barely dip your finger in and hold it there for the count of ten (42oC/110oF).  It's much easier to invest in a thermometer - they are readily available in cookware shops - it has a probe that goes into the liquid and clips on the side of the saucepan.
NOTE:  If the milk is much cooler or hotter than this the yoghurt is likely to fail.

Beat the milk and activator (your spoonful of yoghurt), a little at a time until it is thoroughly mixed.  Pour into a glass or ceramic container that has a lid.
Wrap the container in a towel/small blanket and leave in a warm, draught free place for eight hours/overnight.
It should be like thick custard.  Don't leave longer or it will go sour.
Thick and creamy home-made yoghurt
NOTE:  My Indian friend Nalini showed me how to make yoghurt by this method about 40 years ago.  Her favoured place to leave it to set was in a cupboard on top of her water heater. I put it in an insulated bag (the kind you take on a picnic to keep things cool) and put a tea cosy over it.
NOTE:  Save a spoonful from each batch to make the next one.  The yoghurt, in the picture above, has been 'going' from one I started about a year ago - making a new batch every week with a spoonful from the last one.  This is very easy to do - and tastes delicious.

For an easy way to make ricotta with fresh milk - go to this link.

Sunday, August 12, 2012

Recipe: Chicken Curry - Sri Lankan style

Sri Lankan Chicken Curry
This recipe is a real winner.  I first came across Sri Lankan curries in a cookbook I borrowed from a friend (which ended up on my shelf, with his blessing (thank you Dennis!), for about fifteen years) - Charmaine Solomon's Complete Asian Cookbook - it's a wonderful book that took me on a gastronomic journey all around Asia and many favourites remain in the family  repertoire. 

The only Asian food I had before I came to Australia was 'English style' Chinese (in fact, the first restaurant I ever went to was the Chinese at New Cross Gate in about 1960) - chicken chop suey, fried rice and sweet and sour pork, and my Dad's curry - which was made with the Sunday leftover roast, gravy powder, apples, sultanas and was flavoured with Keens Curry Powder (just the thought of it makes me shudder - I could never eat more than a mouthful).


The secret to making a good curry - and any Asian food, for that matter - is to use the freshest ingredients you can.  It's that flavour bursting in the mouth thing - the 'pow' of chilli, the 'zing' of lemon grass, the 'tang' of lime, the 'smouldering' flavours of cinnamon and cloves - and that's without the exotic, steaming fragrances titillating the taste buds before even one spoonful has gone in.

(The photo shows the rhizome of fresh galangal - see galangal paste recipe)


Certainly, in my lifetime, the world has become a global cafe of gastronomic grazing and most of us are now familiar with the cuisines of Japan, Thailand, Indian, China and Vietnam and, if you have lived in Sydney, you can add Indonesian, Nepalese, Sri Lankan, Bangladeshi, Burmese, Cambodian, Korean, and more.

Turmeric in flower
We are lucky to live in the sub-tropics and be able to grow our own spice gardens with many of the plants used for Asian cooking doubling as beautiful ornamentals e.g. turmeric, curry leaf tree, galangal, coriander, kaffir lime, citrus, lemon grass. garlic chives, banana, chilli, papaya, pineapple etc.
A bunch of bananas growing before my eyes

So, if you really want to make a fabulous curry it's best to grind the spices as you go.  Sometime ago I invested in s spice grinder (just like a coffee grinder) that I keep just for spices - the difference in flavour is phenomenal.  Some spices I can't grow, like cumin and cinnamon, so I just buy them in small quantities and grind them as I need them.  The pungency of ground spices is quickly lost during storage - I too have had the tumbling plastic containers and jars of spices, stored in the pantry for goodness how long, that were so stale you could not discern by colour or smell what they were!
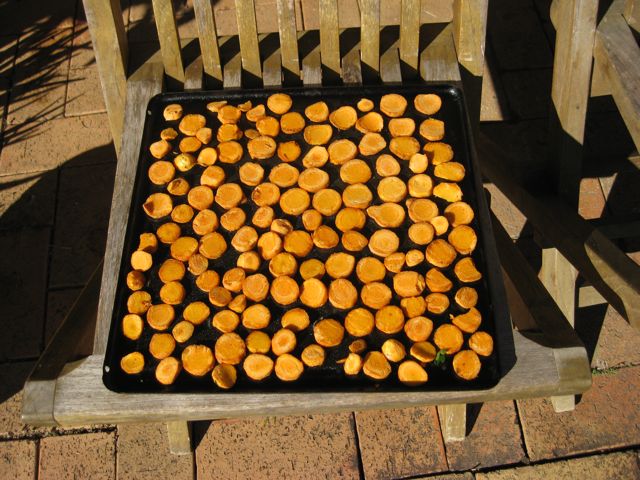
Drying turmeric in the sun

Ingredients
1.5kg chicken cut into 12 even pieces
NOTE:  For good flavour it is always to buy chicken with the bone in it and then cut it up.  The same goes for buying 'free range' (apart from it being 'against my religion' to buy an animal that has been reared in a cage)
2 tbsp ghee or vegetable oil
1/4 tsp fenugreek seeds
10 curry leaves (fresh or dried)
2 large onion, finely chopped (I do it in the food processor)
4-5 cloves of garlic, finely chopped
2 tsp fresh ginger, finely grated
1 tsp turmeric powder
1 tsp chilli powder (adjust to your taste)
1 tbsp ground coriander
2 tsp ground cumin
1/2 tsp ground fennel seed
2 tsp paprika
2 tsp salt
2 tbsp vinegar
1 can chopped tomatoes, or three fresh ones
6 cardamom pods, bruised
1 stick cinnamon
1 stalk lemon grass, bruised
1 cup coconut cream

Directions
1.  Heat ghee/oil and fry fenugreek seeds and curry leaves until they start to 'pop'.
2.  Add onion, garlic and ginger and fry gently until onion are quite soft and transparent.
3.  Add turmeric, chilli, coriander, cumin, fennel, paprika, salt and vinegar and stir well.
4.  Add tomatoes, whole spices and lemon grass.
5.  Add chicken and stir over medium heat until chicken is thoroughly coated with spices.  Cook, covered, on a low heat for 40-50 minutes.
6.  Add coconut cream, taste and add more salt and squeeze of lemon juice if desired.
7.  DO NOT COVER AFTER ADDING COCONUT MILK, OR BOIL, IT WILL CURDLE
8.  Serve with rice and your favourite sambal.

NOTE:  To make this 'a complete meal' I often add some vegetables about 15 minutes before it's finished cooking - this one had potato, carrot and peas.

Galangal in flower

Monday, August 6, 2012

Orange Marmalade: easy recipe for everyone!


Citrus is in abundance at this time of year and I have just been harvesting my first crop of limes and lemons - more exciting than watching the Olympics?!  It also means that I have been the grateful recipient of buckets and bags of oranges, mandarins, grapefruit, tangelos and pomelos.

As we had just finished our final jar of last year's batch it was time to pull out this tried and true easy recipe.

1 kilo of ripe oranges. (You can use a mix of citrus)
A WORD ABOUT ORANGES:  Just picked from the tree is best and I prefer the thin skinned navels.  I have made lots of marmalade from store bought oranges, but you really do have to avoid the overripe ones and those with a 'waxed' skin.  Success with marmalade really depends on the pectin content of the fruit which decreases as the fruit gets older.
1 lime (optional-I just like the combination)
2 lemons, juice and pips (gives a nice tangy flavour and the pips add pectin)
White granulated sugar - about 1kg (see note)
Filtered water - enough to cover the fruit once it is cut up
1.  Slice the fruit thinly.  I use the thin slicing blade on my food processor otherwise it is a pretty time consuming and messy business - this way all the juice is saved (otherwise you end up with juice running off the bench-top!)  Quarter the fruit first, leaving the skin on, and cut off the thick ends of the fruit and any white pithy bits out of the middle (this makes it bitter.)  Add any pips that may be in the fruit.
2.  Put in a non-reactive, heavy based saucepan.
3.  Add the juice and pips of two lemons (you will remove all the pips at the end of cooking) 
4.  Cover sliced fruit with filtered water and leave to stand overnight (or eight hours) with lid on. 
5.  After the sliced fruit has soaked overnight, bring to boil and simmer for one hour - making sure it does not 'catch' on the bottom by giving an occasional stir.
6.  Thoroughly wash the jars and lids you are going to use (this is where a dishwasher is a godsend!) and dry-off in a warm oven for about one hour - make sure it is not too hot or the jars will crack.  This sterilizes the jars so the marmalade will keep and not go mouldy.  At this point PUT A SAUCER IN THE FREEZER - trust me!!

7.  Sugar - to work out how much is required you will need to measure how many cupfuls of this fruit and water mixture you have because YOU WILL NEED EXACTLY THE SAME AMOUNT OF SUGAR.
This batch was eight cupfuls of sliced fruit and water so I needed eight cupfuls of sugar.
NOTE:  With this method you can make any quantity of marmalade.  If you are making this in the winter time you will need to warm the sugar in the oven before you add it to the fruit.  Putting cold sugar in stops the cooking process.

8.  Almost there!  After simmering the fruit for an hour ADD THE SUGAR AND BOIL RAPIDLY until it begins to 'get a bit crinkly around the edges'.  This is where the saucer from the freezer comes in.  Test to see if the marmalade has reached 'setting point' by putting a spoonful of the mix on the saucer.  If a skin forms on top of the marmalade it is ready (push it gently with your finger)  If not, keep simmering rapidly for a few more minutes.  Don't forget to stir it!  This last stage can take anything from a few minutes to about 20.  In the picture above, you can see that the marmalade is already 'crinkly' and sticking to the sides of the pan - this happened after just a few minutes of adding the sugar, because the fruit contained a so much pectin.  DO NOT CONTINUE TO COOK AFTER IT HAS REACHED SETTING POINT.

9. Skim off the pips pips with a slotted spoon.  It is now ready to put into the sterilized jars.  TAKE EXTRA CARE BECAUSE THE HOT SUGARY MIXES LIKE THIS CAN BURN BADLY.  I use a small metal jug to decant it. Cover the jars with a clean tea towel until it has cooled down then put lids on.  If you put the lids on while it is hot, condensation forms and can make it go mouldy.  

NOTE:  The process of writing this - in a way that is clear to others - has made me realize just how much I have learned along the way - firstly from my mother.  I hope you too find it useful and pass it on to someone else.  


http://www.blogger.com/blogger.g?blogID=3515306519466601297#editor/target=post;postID=323239880205794218

Wednesday, August 1, 2012

What is wrong with my papaya?


First of all - a big THANK YOU to the nearly 15,000 people who have logged on to to this blog since I started just a year ago.  I have absolutely loved sharing this information with you - finding the process of research and writing both stimulating and rewarding.  As I said to my husband the other day - I never know where this blog is going to take me - his reply, "Up the garden path"!!


My sick PAPAYAS
Note the mottled leaves, brown dead leaves and spotted fruit


When I came back from my trip overseas we had been away for over two months and the
garden looked mostly OK.  But, one plant looking very sick was my papaya. I had struggled for a while to keep it disease free but now had definitely lost the battle.

WHAT DID I OBSERVE?
 1. Black spots on the underside of the leaves, with them eventually turning brown and dropping off, and accompanying black spots on the fruit. 
2. Large necrotic spots on fruit and rotting of fruit.
ANTHRACNOSE affected fruit - note the pinkish sunken spots that eventually rot large areas of the fruit.

WHAT IS IT?  TWO different FUNGAL diseases that are common to this part of the world and anywhere that has high rainfall and subsequent high humidity.

1.  BLACK SPOT - Asperisporum caricae - a fungal disease which causes the black spots on the underside of the leaves, and while mostly cosmetic on the fruit this condition does affect the overall vigour of the tree (by reducing the ability of the plant to photosynthesize). Plants are more susceptible in cooler months.

2.  ANTHRACNOSE - Colletotrichium gloeaporides - this is a fungal disease that causes watery spots on the fruit and then rapid rotting and spoiling of all the fruit.  It starts as dark sunken spots or lesions and pinkish spore masses may form on the spots.  This can also affect harvested fruit if the fungus has take a hold.  This disease is spread in water droplets and is worse in warm, humid weather.  It can also be spread by infected seed.

My quest in trying to clearly to define these from 'expert' sources had definitely led me up the garden path - even my local fruit nursery misdiagnosed the problem.  So, I suppose the lesson here is that you have to observe closely and do your own research. 

The most important thing I learned was- PROBLEMS WITH PAPYAS ARE CLOSELY LINKED TO NUTRIENT DEFICIENCIES IN THE SOIL - fix the soil, fix your papayas.  Now, read on..................!
BLACK SPOT affected leaves and fruit on papaya

HOW TO PREVENT THESE FUNGAL DISEASES:

CHOOSE THE RIGHT PLANT:  Check before you plant that they are healthy and disease free.

WHERE TO PLANT:  Papayas like a well-mulched soil that is free draining.  Try to plant away from other shrubbery as a free air flow will help to reduce fungal spores from spreading.

SOIL PREPARATION:  Papayas are very susceptible to nutrient deficiency which weakens the plant and renders them more vulnerable to these fungal attacks.  

Black Spot is often a condition affecting plants deficient in POTASSIUM, PHOSPHORUS and MAGNESIUM.

Anthracnose affected plants are often lacking in CALCIUM and NITROGEN.

What this tells me is that the heavy rain we have had in recent times has depleted the soil of nutrients AND that papayas need regular feeding to keep them happy - a bit like us really!

1.  Check the pH (see UNDERSTANDING SOILS at top of page) - the wrong pH can 'lock-up' nutrients.  They don't like acid soils - which is what we get after long periods of rain.

2.  MULCH, MULCH and more MULCH - this will help to stop the nutrients from leaching away, add vital organic matter and essential nutrients.  Lucerne mulch is particularly good for increasing potassium/potash.

3.  GIVE THE SOIL A DOSE OF EPSOM SALTS - this is magnesium sulphate and will help with any magnesium deficiency.

4.  GET INTO GOOD HABITS - feed the soil!!! - remember food is only as good as the soil it is grown in - chicken manure, rock dust and a soil drench of trace elements after heavy rain.  Regular liquid feeding of the soil with COMPOST TEA (see previous post) or seaweed fertilizer will do the trick.

WHAT TO DO WITH MY PLANTS? 
1.  Rip them out and start again somewhere else in the garden - mine had been crowded out by other plants and I needed to put them somewhere with a better flow of air around them and more sunlight.  Destroy all affected plants.

2. You can cut pawpaw's back quite hard, almost to ground level, and they will re-shoot from the main stem.  When there is a flush of new growth DO A PREVENTATIVE SPRAY OF A COPPER BASED COMPOUND.


The same PAPAYA - now healthy - after cutting right back, feeding with an organic fertiliser (compost and rotted manures - which helps to correct pH imbalance and provide the macro-nutrients of nitrogen, phosphorous, potassium and calcium), mulching and applying some complete trace elements (supplying all the essential micro-nutrients like iron, manganese, boron etc) and monthly liquid feeds with compost tea during spring and summer.


Friday, July 20, 2012

Fresh Fennel Salad


FENNEL Foeniculum vulgare var.azoricum:

When I am away from home and can't sleep I do a mental tour of the garden - a bit like counting sheep - and it never fails to do the trick!  After a big trip overseas to the UK and Greece, it was great to get back and find how much everything had flourished but, for the first few days, because of all the unseasonal rain they had, I had to curb my itchy feet and fingers and stay indoors because the ground was like a quagmire.


One of the things I had to harvest straight away was this beautiful fennel.  I recently invested in a mandolin - not an instrument for duets with my ukulele, but a very sharp bladed tool for slicing things thinly - just what you need for fennel, but you have to watch your fingers as it is lethal (get one with a guard!).

It is easy to grow through the colder months - being used as a late winter vegetable either fresh or braised.  Just plant seedlings (seeds are easy to grow) in late summer in an old composted bed - it won't need any feeding after that - just keep well watered and harvest when the white bulb at the bottom is thick and fleshy.

NOTE:  'Bulb' fennel is also known as Florence fennel or sweet fennel and not to be confused with the straight species  Foeniculum vulgare -  an aromatic, rather weedy herb fennel which shows no swelling at the base; can get to over 2m and grows wild all over Europe. A familiar sight in Greece is to see folk (usually men) scouring the hillsides for 'wild' greens (horta) and herbs like fennel - they use it for cooking particular dishes - think cheese pies with fill pastry!

It's a prized vegetable in many parts of Europe - cropping up in lots of Italian, French and Greek cooking.  It's crunchy, sweet, aniseed flavour goes well in green salads or sliced with oranges - Italian style. Anything with these kind of flavours and fibre is very good for the stomach - I can guarantee that you will feel great after eating a meal with fresh fennel in it!


Fennel, Carrot and Beetroot Salad:  This is something I have eaten with fish in Greece.  It's simple to make with crunchy, fresh flavours and with beetroot, carrots and fennel being plentiful and cheap at this time of year, a good late winter salad.

1 fennel bulb, shaved thinly
1 cup grated carrot
1 cup grated fresh beetroot
1 spring onion, chopped finely
1 tsp toasted fennel seeds
Juice of 1 orange,
1/4 cup extra virgin olive oil
1tbs sherry (or red wine) vinegar
Salt and pepper


  • Toss fennel and carrot together,
  • Mix with toasted fennel seed and spring onion
  • Arrange grated beetroot around edge (or in the middle) - otherwise it will 'bleed' into other ingredients
  • Mix dressing and our over salad about 20mins before serving
  • Mix together orange juice, oil, vinegar and salt and pepper
  • Pour over salad just before serving
  • Garnish with fresh parsley, mint or dill
NOTE:  I also thinly slice fresh fennel over a salad of tomatoes and olives with a simple olive oil and lemon dressing.  Fish and fennel are also great partners.

NOTE:  Nicholas Culpepper is one of the most famous herbalists that ever lived and wrote the 'bible' for anyone interested in herbs Culpepper's Complete Herbal.  He just happened to live a very long time ago 1616-1654 and published his famous book in 1653.  Here's what he had to say about fish and fennel:

"One good old fashion is not yet left off, that is to boil fennel with fish: for it consumes the phlegmatic humour which fish most plentifully afford and annoy the body with.  I suppose the reason of its benefits this way is, because it is an herb of Mercury and under Virgo, and therefore bears antipathy to Pisces.  Fennel is good to break wind, to provoke urine, and ease the pains of the stone and helps to break it."  So there you go - from the horses mouth, so to speak


Sifnos, an outdoor oven perfect for cooking up some red mullet!


Tuesday, July 17, 2012

Great Dixter : Saving the best for last!


GREAT DIXTER, Northiam, Rye, East Sussex, UK
View from the 'Hovel' across the Topiary Lawn


I really knew nothing about Great Dixter before we paid a visit at the end of our UK trip.  I did have a small notation in my ‘little black book’ with a star beside it (which means ‘try and do if possible’) so I had seen something about it somewhere, but I wasn’t sure where or why?

Well!  What an absolute joy.  My husband Michael is not a gardener ( but he knows a good thing when he sees it!!)  and as soon as we walked in through the gate his jaw dropped open (mine was already on the ground) as he was exclaiming “oh my god” (along with a coach-load of French gardeners who had come for the day across the Channel - one of the joys and curses of being in Europe)

Entrance to the house
Great Dixter in Sussex is a 15th century house (Tudor style) and is unusual in that the gardens surround the house – one leading to the other – with views from the house to every part of the garden and back to the house again, which forms the central focus and gives feeling of intimacy.

The first glimpse of the house itself is truly a surprise being the oldest, largest example of a Tudor Hall in the country; it sits, like a timbered, reclining hulk in the middle of this glorious garden and is still occupied by members of the Lloyd family  Be sure to get a house and garden ticket - you won't be disappointed. (I would have given my favourite trowel for a few of the plant books in the magnificent library)

Self-seeded Iceland Poppies 
The modern history of the estate, and what we see today, starts with its purchase by Nathanial and Daisy Lloyd in 1909.  They then employed the eminent English architect Edwin Lutyens (famous for designing New Delhi) to help with extensions to the house and design of the garden.

Though Nathanial Lloyd began the gardens, it was his youngest son Christopher (Christo), born in 1921, who would make Great Dixter one of the most beautiful private gardens in the world. He lived there permanently from 1954 until he died in 2006.

The 'Peacock Garden'

Gardening is the English national passion as much as football.  In fact the whole landscape is cultivated (it’s hard to find a ‘wild’ place anywhere in England) and you are often looking at a rose bush or hedge that is a hundred plus years old – there are beautiful plants and gardens everywhere.  (The Chelsea Flower Show had just started when I arrived and the BBC devoted hours of prime-time broadcast every day for a week to this one spectacular garden show).  Gardeners here are stars of radio and television and, unlike footballers, write their own books. This was certainly true of Christopher Lloyd who was as much a writer as plantsman and gardener.  Finding out about all of this made me realise that I had ‘known’ him for a long time having, over the years, read some of his articles, but just not associated him with this fabulous garden that is Great Dixter.

This is not a fluffy cottage garden.  You are greeted with a view up to the house over breathtaking flowering meadow full of colour and movement with some ancient gnarled-trunked pear trees dotted here and there.

The meadows throughout the garden were a particular love of Christo’s mother, the aptly named Daisy – not an easy project to implement because wild meadows only grow on impoverished soils and usually means scooping tons off the top layer.  Well, a hundred years of perfecting the ‘dream’ have paid off - they are an absolute glory and only mown twice a year (so make sure you go when they haven't been mown) Sadly, 95% of meadow habitat in the UK has disappeared since the second world war which has resulted in a tragic decline of wildflowers and assorted wildlife – but the meadows at Great Dixter are going some way to demonstrate their beauty and conservation which go hand-in-hand with their year round education programme and workshops.


Your are then lead seductively around the garden along flagged pathways and clipped yew hedges to catch views into other ‘rooms’ via archways and gaps in the planting. Plants take centre stage at Dixter and Lloyd was renowned for his flamboyant use of strong colour, with blooms from the earliest spring bulbs right up until the first frosts of autumn – much of it self seeded from season to season.

The fantastic groupings of vibrant flowers, grasses, shrubs and trees was breathtaking.
Before Bunnings!

Every kind of skill a gardener has at their fingertips is in evidence at Great Dixter; dry stone walls, flagging, topiary, easpalier, hedges clipped to every size and shape imaginable, woven willow plant supports and screens, water features, sunken gardens, potted plants and so it went on.

The 'Long Border'
Apart from the meadow garden you also have the joy of discovering the high garden, the lavender garden, the sunken garden, the topiary lawn, the rose garden and the long border - which he made 300ft (100 yards) long. Enough to keep you busy for a lifetime.

If you can drag yourself away there is also an amazingly productive vegetable garden; the largest compost heap I have ever see; orchards and fantastic propagation area and retail nursery.

The 'Succulent Steps'

What this garden said to me was that here is NATURE in all its glory and here is the dedication, ingenuity and skill of MAN.  They have had a very happy marriage where they complemented and enhanced each other without domination – in other words HARMONY reigned.
The Meadow with Spotted Orchids


Fortunately the task of maintaining this balancing act is in the good hands of a private trust and the head gardener of 15 years, Fergus Garrett - who was an apprentice gardener to Christopher Lloyd.  The character of the place is still very much of those who lovingly created it and tended it for over a hundred years.  Unfortunately, this cannot be said for other houses and gardens that become ‘National Trusted’, like Sissinghurst.


Do put Great Dixter in your little black book - with lots of stars next to it - and make sure you go between spring and August (because they do their first cut of the meadow sometime in August and you will miss it!).


For an inspirational story about meadows and their importance go to this link Prince Charles and the Crown Meadows.

Thursday, July 12, 2012

Greek Salad:Back Home!!!!

iOS - the old hilltop town


It's exactly two months since I left home and I am sorry for the lack of input over the past few weeks.  After our visit to the UK we took ourselves off to travel round Greece for a month  (it was our 40th wedding anniversary - I really don't know where all those years have gone?) - Crete, Ios, Sifnos, Syros and Athens (all wonderful!) - and are finally home to a damp, chilly and wintery Mullumbimby evening.
GREEK - Greek Salad

The homecoming was not too bad: we arrived,with our luggage, and all in one piece; there were beautiful notes and pictures from our grandchildren to greet us plus a big bag of citrus from my friend's garden.  (I won't talk about the box of mail - mostly the kind you don't want in window-face envelopes).  A quick inspection of the garden (with a torch) made me happy - there has obviously been a lot of rain, it was flourishing and I was able to pick enough veggies to make a quick curry.


Ios - from the top!

To sum up the food in Greece - mostly wonderful - fresh, flavoursome, local varieties and produce, mostly sold bare weight - because the locals demand fresh food for at least one meal per day. The tomatoes and bread were worth the price of the ticket alone.  There was fresh food everywhere.  That doesn't mean to stay there are not a lot of unhealthy looking people - the standard Greek breakfast is 3 pieces of cake, 3 'frappe's'(iced coffee) and three fags (smoking is a national pastime!)


Fresh is best - local produce on Ios

The staple of every Greek meal is a salad consisting of tomatoes, cucumber, olives and feta cheese - dressed with dried oregano/thyme, olive oil and salt - Greek Salad. Optional extras are; thinly sliced red onion, capers, sliced green capsicum, braised fennel, chunks of toasted barley bread(Crete), soft cheese(Sifnos) - and there must be dozens more variations that I haven't tried yet.  If this sounds boring - it is not because the produce is fresh and has texture and flavour.  I asked my husband why he liked this salad too and he said 'because it's satisfying - when you eat a tomato in Greece, it's like eating a mango - and the cheese makes it hearty - a meal in itself'.

Our guide, on our way to Homer's tomb on Ios (and I thought he was not for real - Homer, that is?)

The trick to making a good Greek Salad - and believe me I have had plenty of bad ones outside Greece - is to make it with the best and freshest produce you can - that also goes for the olive oil and the olives.
Tomatoes - use ripe, but firm ones and cut into bite size chunks.
Cucumber - the small, thin Lebanese variety with either the skin peeled or scored so that it will hold the dressing.  No big, flabby ones please that are all seed.  Cut into chunky halved circles.
Olives - firm, whole ones - no pitted ones please (or you loose most of the flavour)
Feta - sheep or goats is best - creamy, but crumbly (not rubbery or too salty)
Olive oil - extra virgin and fresh - not something pale yellow that has been sitting on the bench top in a clear glass bottle for ages or, heaven forbid, a plastic bottle.
Put a slab of feta lastly on the top (not chopped up in the salad!) and drizzle the oil over the top of this and sprinkle with the dried herbs and sea salt.  Serve with fresh strong bread - essential for mopping up the salad juices.  See previous posts on slow-bread making and Greek baked beans (gigantes) for a complete meal.  Yamas!

Our 40th wedding anniversary on Ios - not a bad place to be!
Every talks about Ios being a mad party island, but if you go early or late in the season, you can have a wonderful time - we did!.